
This is a basic guide aimed at beginners who have just received a Raspberry Pi / Pi-face and want to know how to set it up, I felt the need to write this up after receiving a PiFace and not be able to find any decent documentation on how to set it up. I hope this helps and let me know if you have any comments. You should be able to have the PiFace setup and working within an hour.
If you looking for a place to buy the PiFace internationally go here – Buy PiFace Worldwide
Step 1: Preparing the SD Card
Download the ‘Wheezy Raspian' image file from the Raspberry Pi's website download page you will also need to download the Win32DiskImager, also on the download page (assuming you are using windows). Connect your SD card to your PC, open up Win32DiskImager and browse for the image file you just downloaded (you will need to unzip it first), select your SD card drive letter from the device drop down list and then press write to write the image to your disk.
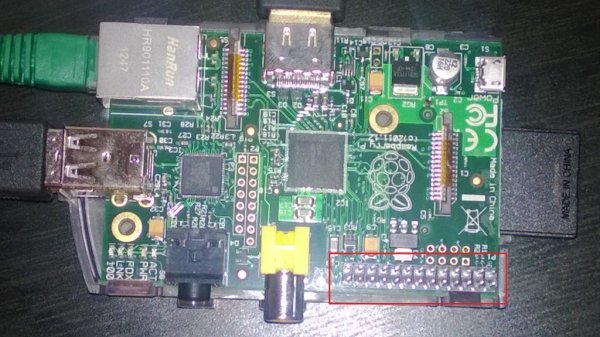
Step 2: Connecting the Pi/Piface
Your PiFace has a 26 port connector on the bottom that connects to the 26 pin GPIO connector on your Raspberry Pi, connect these together, pop the SD card in the SD Card Slot on the Pi, and plug in your network cable, monitor, keyboard and mouse.
Power on the Pi.
Step 3: Setting up your Pi
On the initial setup screen you will most likely want to select the Expand File System option using the arrow keys to move and enter to select, when the pi comes back to this screen you will want to select option 3 to enable boot to desktop, on the next screen select ‘Desktop log in as user ‘pi' at the graphical desktop' as this will set your raspberry pi to auto login to the desktop as the user ‘pi'.
Step 4: Configuring the Pi for PiFace
The first thing we need to do is enable the SPI driver, so open a LX Terminal and type in
sudo nano /etc/modprobe.d/raspi-blacklist.conf
This should open the file in the command line, using the arrows scroll down to the line that says
blacklist spi-bcm2708
and insert a # in front of it (this comments out the line stopping the SPI driver being disabled on boot up), press
CTRL + O and then Enter
to write out (save the file) followed by
CTRL + X
to exit nano. Reboot your Pi. Tthe PiFace libraries are now installed in the raspbian image by default however we still need to install the emulator which is handy for testing (this is not required to make the PiFace run). To install the emulator use the following command in your terminal window, this will take a few minutes
sudo apt-get install python3-pifacedigital-emulator
Once installed you should have a desktop icon for the emulator.
Step 5: Testing the PiFace (Emulator)
(This assumes you have installed the Emulator from the Previous Step)
Open up the PiFace Digital Emulator, from the ‘Enable' menu select ‘Output Control'.
Pressing buttons 0 – 7 in the output control box should light up all the LEDs on your PiFace Board, assuming your board lights up your PiFace is now fully configured and working.
For more detail: Setting up a PiFace with your Raspberry Pi