The smart refrigerator is a refrigerator where a lot more can be done with it than just cooling food. it can also do shopping and more.
Story
Idea
The smart refrigerator is a refrigerator where a lot more can be done with it than just food cooling. The smart refrigerator can record the products and send messages to a website or mobile phone application through amazon EC2 which gives various options and various features including :
- Lets you check the status of a certain product so you can keep informed about the products that are in your refrigerator and the products you need to order soon also informs about orders it put on your side
- The Device idea is based on a camera ( usb /Raspberry pi camera module ) put inside the fridge and opencv library with raspberry pi so it can detect the number of products WITHOUT requiring input from the user
- also it will have an accompanying Android application to check automatic buying of any product (after buyer's approval once through the website we built on Ec2 instance ) before they run out through amazon Dash Replenishment Service (DRS)
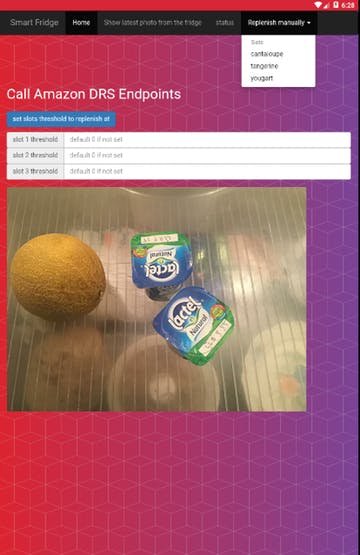
- it can also send picture of the products available live from the fridge to the mobile application and ask the user if he needs to buy anything else not inside the fridge or replenish a specific product manually or change the slot threshold at which it should replenish certain product
Commercially Talking
The smart fridge concept is already available but require the user input to manually specify the products but the challenge here is not just sending a photo to the user but to automatically detect products and automatically buy (after user specify at how many left in the fridge ) through DRS
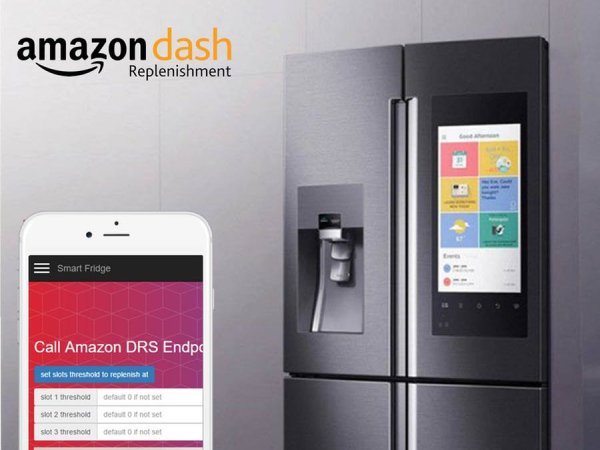
and with a relatively cheap device like this your can turn your ordinary fridge into a smart Fridge that worth 5,800 $ (the last time i have checked it)
I also believe that with machine learning and image processing we can see this device in near future where we don't need to go shopping for same thing from time to time and no more shopping lists on the fridges
Demo of the final project
register here
- https://dkyf2jsa9ujaq.cloudfront.net
Let's get started
First of all i have tagged this project “Super Hard” for 2 reason:
1 – it sounds awesome 😀
2 – it really needs a wide knowledge of programming with different languages and operating system as we will be using Linux on the Raspberry pi so you should be familiar with installing on Linux and compiling with cmake and G++also we will go through lots of programming languages:
From html , php , twitter bootstrap framework ( for the website) to java (for the android app ) and c++ ( image processing ) and python ( also image processing and other scripts)
but i am quite sure it won't be that hard it ‘s not rocket science and i will explain every thing in details as much as i can and you are more than welcome to ask me anytime
Amazon dash Replenishment Setup (DRS)
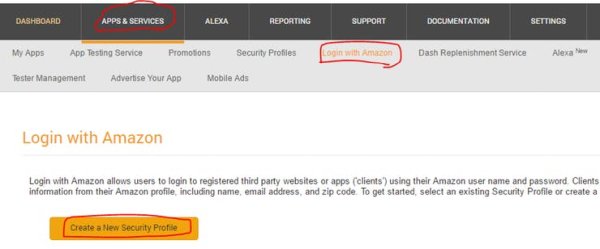
log in to amazon developer account or create one first then choose “APPS & SERVICES”–> Login with Amazon and create a security profile
setup your security profile as in the picutre
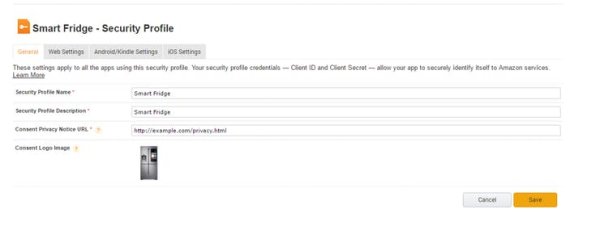
then add allowed origins and redirect urls to web setting

you will aslo need to create SNS Topic for DRS notify you (the device maker) of changes to device status, order state, subscription status, and more.
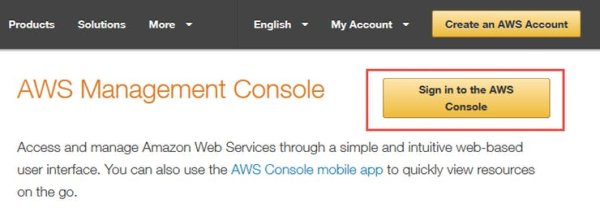
1- Log in to the AWS Console.
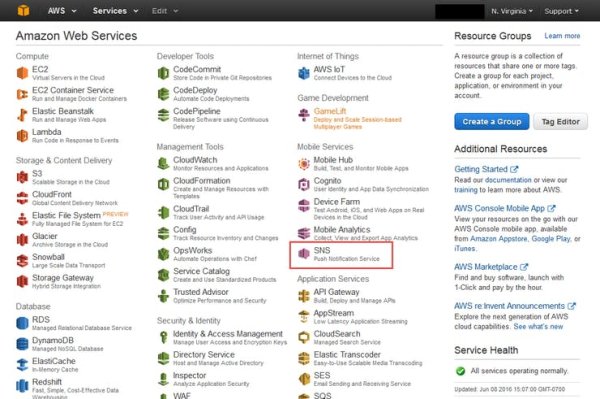
2- Select SNS from Mobile Services
3- From the left navigation, click Topics, then click Create new topic.

4- Enter a Topic name and Display name, then click Create topic.
- Topic Name – Used to create a permanent unique identifier called an Amazon Resource Name (ARN), which will be used to configure your SNS Notifications.
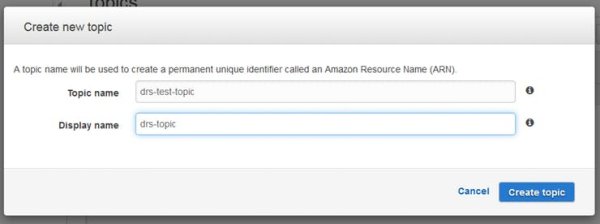
5- Click the ARN for the topic you’ve created.

6- Click Other topic actions and then click Edit topic policy.

7- From Basic View, under Allow these users to publish messages to this topic, select Only these AWS user and enter your AWS Account ID and the DRS AWS Account ID.
- To access your AWS Account ID, go to the AWS Console.
- Enter the following for the DRS AWS Account ID: 476877469412 (this is an example add your own id)
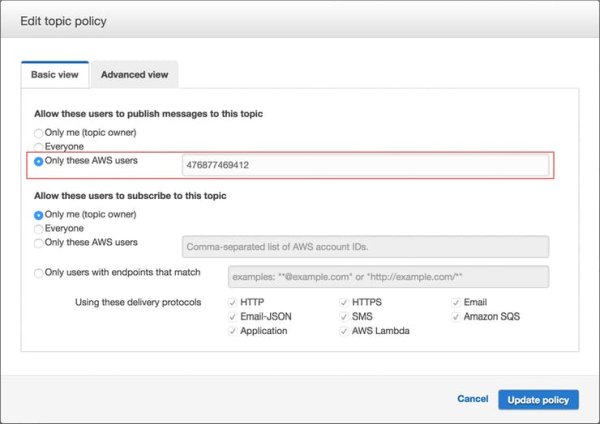
8- Click Update policy.
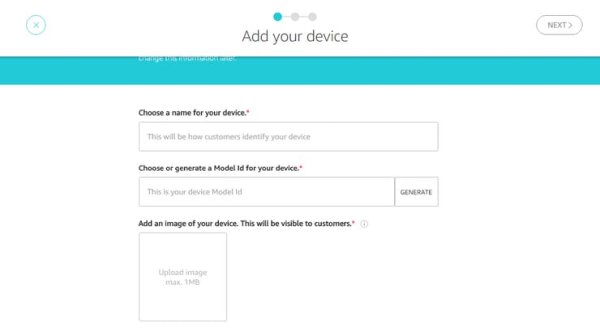
now it's time to create a DRS device click on “Dash Replenishment Service” and click “create a device”
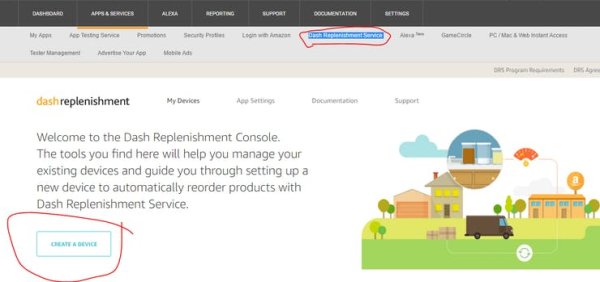
add device name and image click next then add ASIN number for each slot you want
ASIN is ( Amazon Standard Identification Number ) which is a unique 10-character number for each product you can see the example here
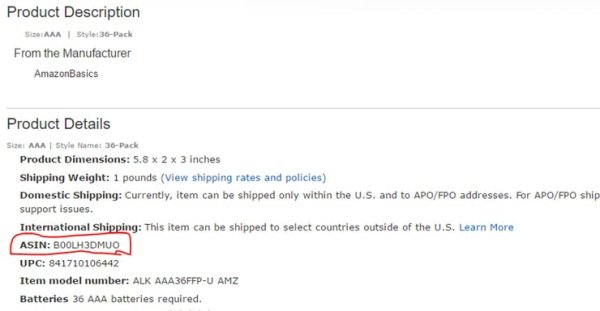
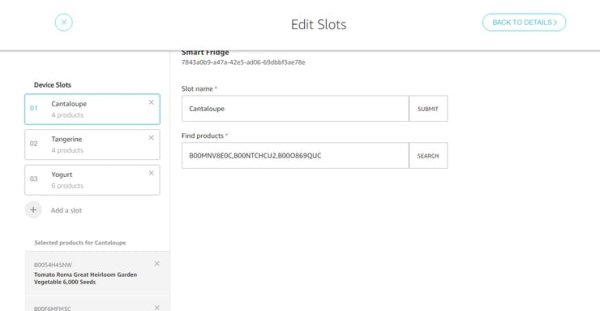
here i am using 3 slots for 3 different products added from 1-4 ASIN numbers of the same product in each slot not all the products on amazon.com are supported by Dash Service yet only products sold by Amazon.com are
here i have created 3 slots one for Cantaloupe other for Tangerine and third for Yogurt
now we have setup our device from amazon Dash let's start developing the webserver
Setting up our server on Amazon Ec2 instance
why do we need a web server we can definitely go with amazon database and aws lambda but we still needs webpage for the new users to register and subscribe to amazon Dash also i find it easier to manage all data from one loaction .
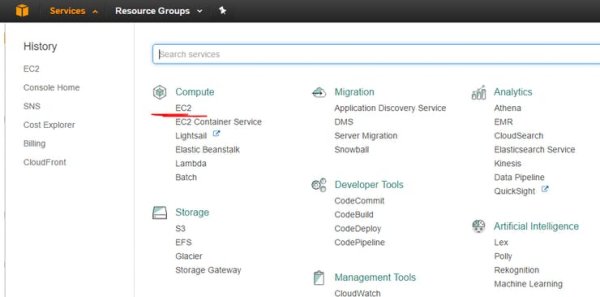
- we will need to sign up on amazon aws you get first year for free to experement different services we will start with amazon Ec2 and create a windows server instance after logging in click on services and choose EC2
- click on instances
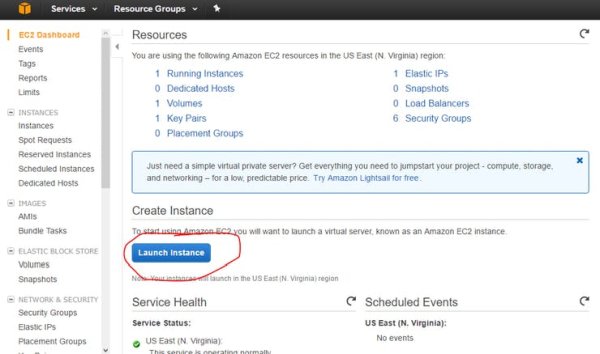
- check that it says “free tier eligible” and choose windows server 2012

- also choose free tier eligible instance type and click next
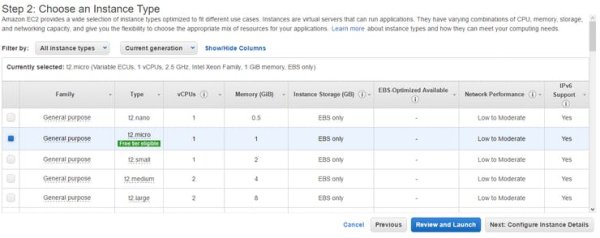
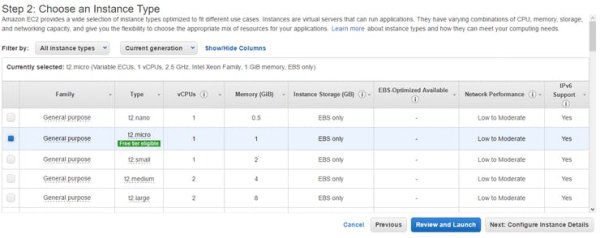
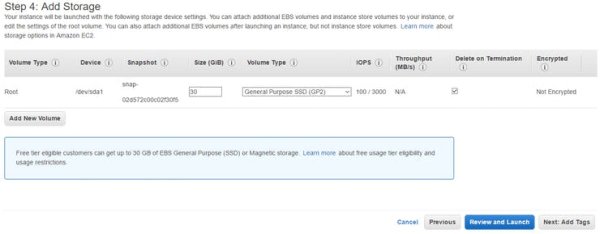
- check that storage is 30 GB so it will still be free and hit next
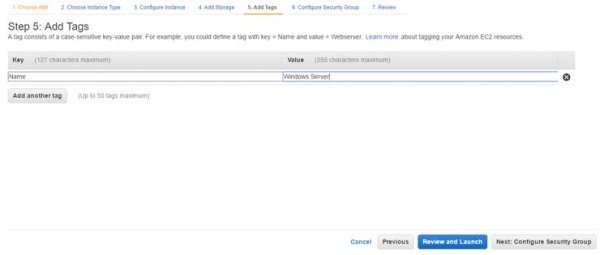
- add a name to your instance let's call it “Windows Server”
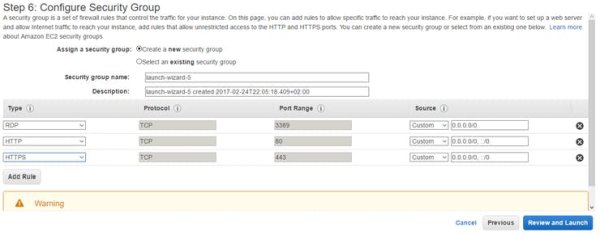
- create a new security group and add http and https protocols as in the picture review and launch your instance
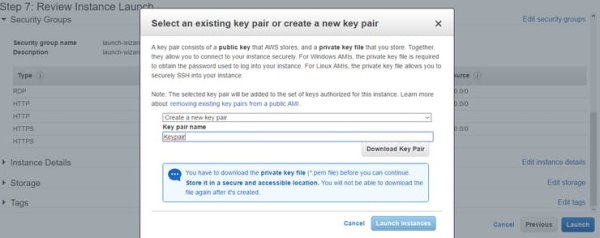
- after you click launch this is and important step create a key pair and click download as save in good place since you won't be able to download it again this is the way to access to your instance
- go back to Ec2 Dashboard and you should see your instance running right click on it and choose connect
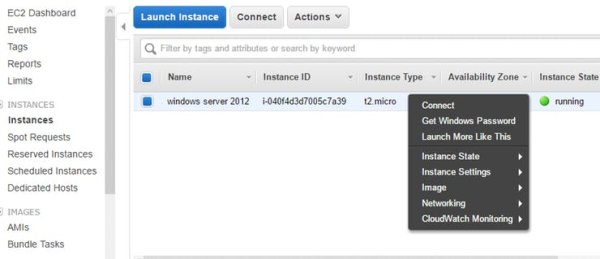
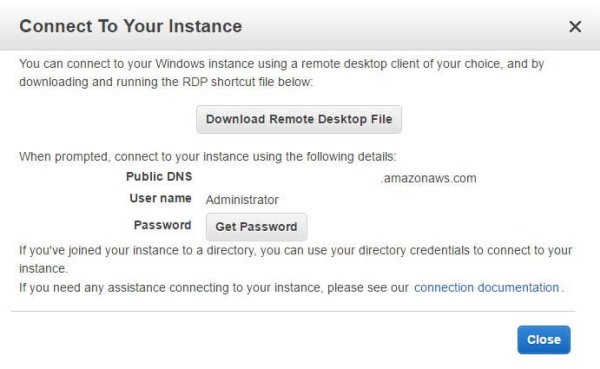
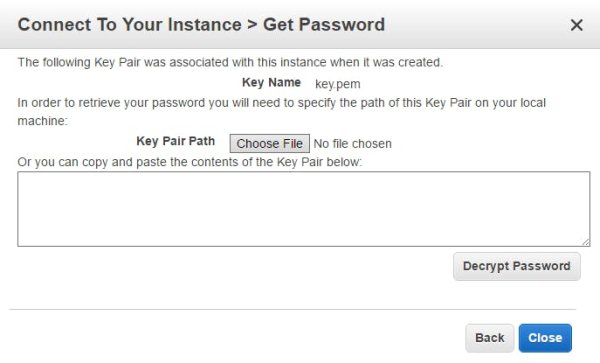
- download the remote desktop file and get password where you will be asked to choose the key file we ‘ve previously downloaded and decrypt the password
- now double click the remote desktop file and enter the decrypted password to login to the server
- to be able to use wamp server we need first to configure the firewall on the server and Internet explorer to enable downloading files
- click Network and Sharing Center then choose widows firewall
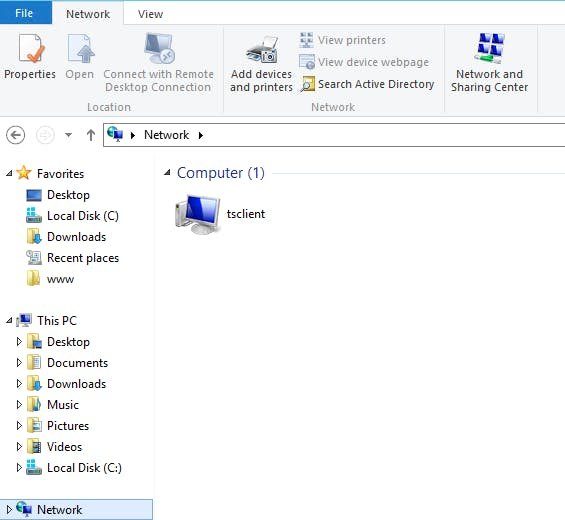
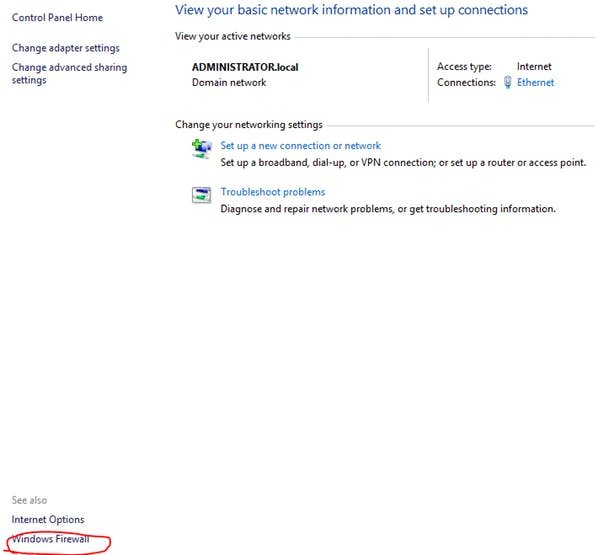
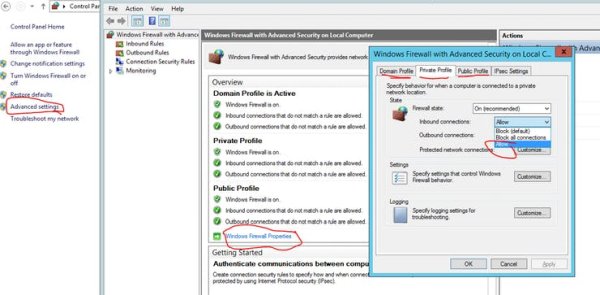
- click advanced settings –> windows firewall properties –> allow inbound connection in all 3 tabs “domain /public/private profile” and click ok
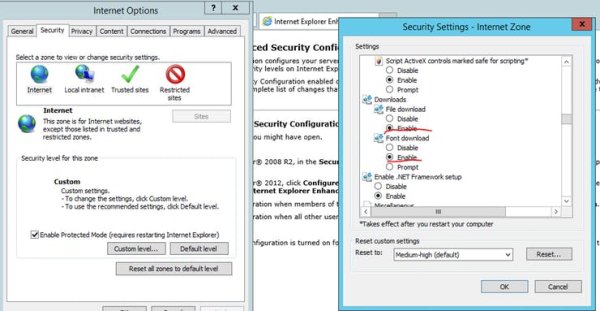
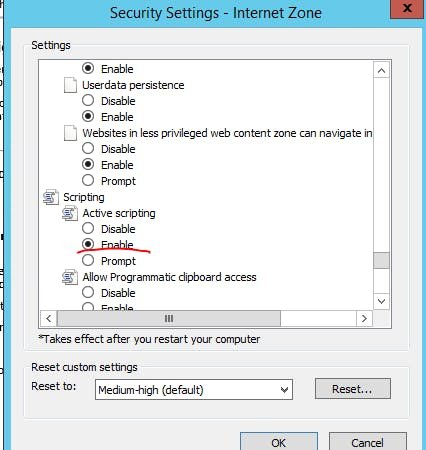
- now go Internet explorer settings –> internet options –> security choose internet instead of trusted and click custom we will change 3 items here “download file” set it to enabled , “download fonts” alse enabled and “Active Scripting”
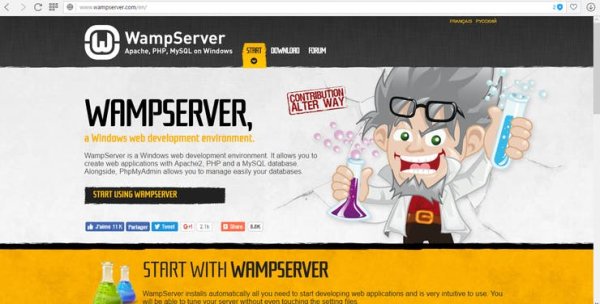
- downlaod wamp server from here and install it :
- http://www.wampserver.com/en/
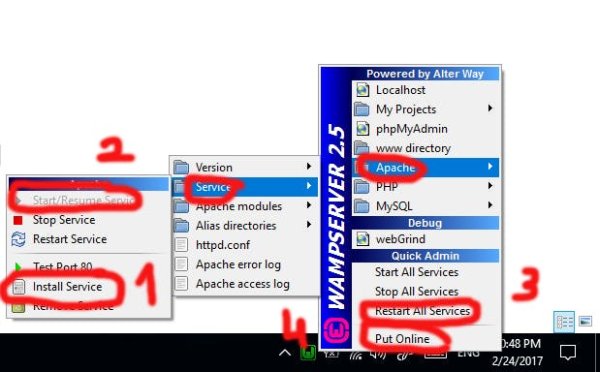
- you may need to install visual c++ redistributable 2012 the wamp server icon should now be green if it's orange try these steps
- now we are done you can click localhost to see default page or phpMyAdmin to access to the database
- the code will be include the html files and php you can add then to wamp server folder insede “www” folder or just check the live website here
- I have also added CloudFront to the webserver to handle https requests and ssl certificate as logging to amazon need to be done from website with https protocol
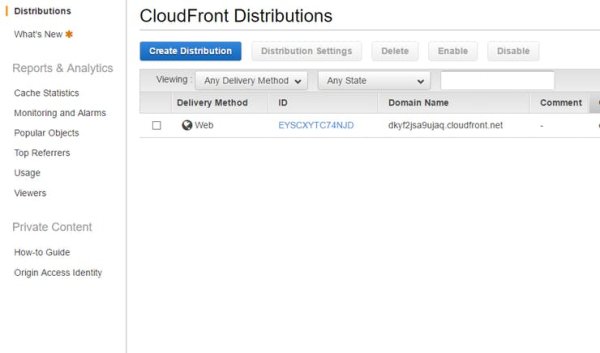
- https://dkyf2jsa9ujaq.cloudfront.net

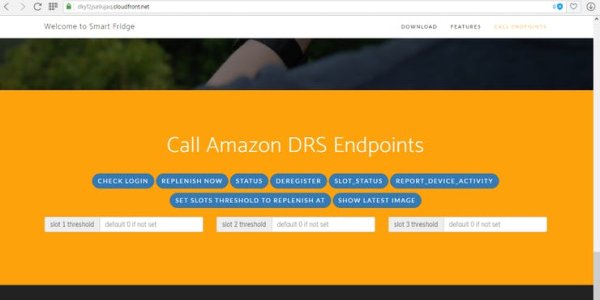
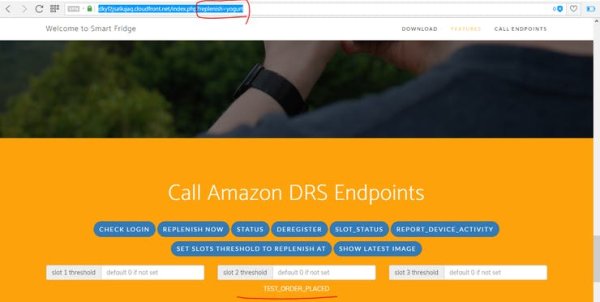
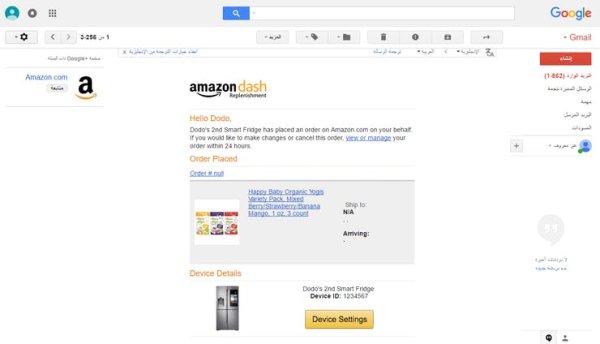
- we will use this website after setting up our raspberry pi as it sends the data to the server and we can check what it send from this website and android app you can also test amazon php api after signing up ( you can replenish Manually since no device , send activity report to amazon ,set slots threshold and check your subscription ) without having an actual device but you cannot get of course latest image from fridge or actual number of products ( default 0 so if you try to change slot threshold it should auto replenish ( don't worry it's test order it won't actually buy anything just send you an email with order number= NULL )

- this of course is done by the device but i have added these option for testing the functionality even without the device we will know how to make the device do all of this on it's own in the raspberry pi section )
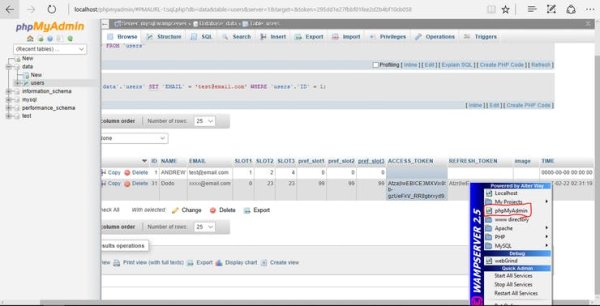
create a table called users in the databse you can access this page from wamp server icon –> phpmyadmin (user : root password: [leave it blank] )
here i am using 13 coloums for id , name , email , 3 slots , 3 pref_slot (are the threshold values at which server should replenish ) , access token , refresh_token , image encoded string , time of last login to calculate access token expiry time
Getting to know Our php API
it mainly based on GET and POST requests sent to our webserver and it handles the rest for example the main url is https://dkyf2jsa9ujaq.cloudfront.net if i added /index?status=true it will do the same function as clicking status button to get the latest image the link will be like https://dkyf2jsa9ujaq.cloudfront.net/index.php?getimage=true this will only work after signing up ( and if you don't have a device the won't be an image ) but now we got the idea
let's check some of the function we have these functions will be located in code file api_functions.php this is the file you need to include to use the api other file called api handles request sent to it i will write them down they all starts with /api.php? or /index.php?
1- setimage=(encode text of image file) //send image to server used by the device
2- getimage =true //same as clicking show latest image it preview the image from the device as in the demo video
3 – tangerine =(number) //this is used by device to update slots consumption level (same for cantaloupe= and yogurt= )
4- refresh=true //check refresh token if need or not ( handled automatically)
5- status=true //return latest consumption level of all slots updated from the device
6- slot_status=true // report slots staus to amazon endpoint
7- report_Device_activity=true //report device activity daily
8- deregister=true // de-regesiter you will need to sign up again after clicking this button and ( you will need to click logout at the top of the page and login again)
this is the code in api_functions.php to replenish
$c = curl_init('https://dash-replenishment-service-na.amazon.com/replenish/'.$slot);
curl_setopt($c, CURLOPT_HTTPHEADER, array(
   'Authorization:' .'Bearer '. $_SESSION['access_token'],
       "x-amzn-accept-type: [email protected]",
       "x-amzn-type-version: [email protected]"
   ));
curl_setopt($c, CURLOPT_POST, true);
curl_setopt($c, CURLOPT_RETURNTRANSFER, 1);
$r = curl_exec($c);
   if (curl_getinfo($c, CURLINFO_HTTP_CODE) == 200)
       {
           $d = json_decode($r,true);
           print_r($d['detailCode']);
           echo "<br>";
       } else{
            $d = json_decode($r,true);
           print_r($d['message']);
             echo "<br>";
       }
curl_close($c);
}
you will only need to write replenish() after including the php file same for :
Deregister()
report_Device_activity ()
slotstaus()
login()
other functions update or modify the database on the server in file called Db_Functions.php
all other endpoints on amazon documentation are written inside this php file
Image Processing (Color detection and SIFT algorithm )
Here we have 2 main algorithms for image processing by opencv first one is color detection for any fruits of different colors and the other for products that cannot be identified by their color as the yogurt i am using here as an example it can be identified by SIFT or ( Scale-invariant feature transform ) algorithm which is about Keypoints matching between 2 images we first add sample image for the product we want
( To add sample image : i have also written a python file to do this called “camcropping.py ” it opens the camera then click ‘a' to pause then click and drag around the product and give it a name and it will save the product sample image )
let's talk about the 1st algorithm :
Color Filtering and detection (how it works)
Disclaimer : this code is based on this open-source code here with MIT license in the link
https://github.com/kylehounslow/opencv-tuts/tree/master/multiple-object-tracking-tut/part-three
Licesnse :
https://github.com/kylehounslow/opencv-tuts/blob/master/LICENSE
1 – it converts BGR to HSV colorspace
unlike RGB, HSV separates the image intensity and the color information. which makes it much easier for color filtering
2 – it takes this image and filters the pixels according to min and max values
you can set these values manually through the trackbars or autodetection code by draging the mouse around the object you want to filter from the image (demostarted in the video below)
3 – morphing the filtered image to decrease the noise by erode and dilate function
“Erode” function from its name erodes into white space decreasing the noise and also the object we are filtering so we use it first then call the dilate function .
“Dilate” function does the opposite by increasing the white space (after the noise is cleared by the erode function ) mainly on the filtered image making it larger
for further reading check this link : http://docs.opencv.org/2.4/doc/tutorials/imgproc/erosion_dilatation/erosion_dilatation.html


finally we will call findContours method to find the outline of the filtered image then Moments method to get the area the contour is covering
Here in this video you will see 3 allgorithms (they are one but at different development stages)
1- calibration (autodetecting colors threshold hsv values) then these values are saved in output.txt file and copied to the 2nd algorithm
2 – testing after calibration ( demo algorithm ) to check values are correct and each fruit is
3- Process Image to text (this will be compiled on the raspberry pi ) the third on is same as 2nd but no interface and saves the resulting fruits count and name to text file called data.txt that will be sent to the server from the raspberry pi after compiling this project on the raspberry pi
for the 2nd algorithm :
it ‘s written in python and uses SIFT
finds the keypoint in the images Each keypoint is a special structure which has many attributes like its (x,y) coordinates, size of the meaningful neighborhood, angle which specifies its orientation, response that specifies strength of keypoints etc.
so in any orientation and any scale the image will be still detected
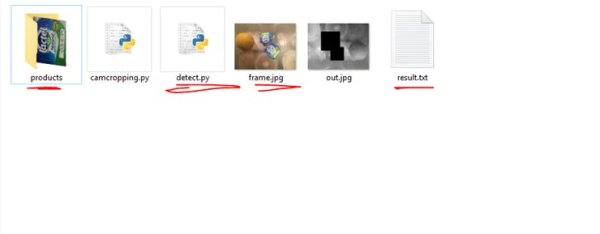
in this example the detect.py file check all files in the products folder with any name and detect if the image matches key points in the frame.jpg then draw black rectangle on the product it finds and search again till all products are detected and output result as out.jpg and result.txt file containing the product name ( name as filename in products folder ) and number found and write it this format –> “yogurt 2” this file with data.txt will both be sent to the server from the raspberry pi
let's see them working:
Setup the Raspberry pi 3
This is raspbian jesse with some modification to the desktop environment
we are going to install opencv 3.0.0-rc1 i have tested the code with other version but there was a bug in later version it printed “assertion failed” but this is the version i used so if you face any problem like this this version is working great
1- Install dependencies:
install cmake , image I/O packages , video I/O packages ,GTK development library ( for highgui module in opencv to compile ) and python headers
$ sudo apt-get update
$ sudo apt-get upgrade
$ sudo apt-get install build-essential cmake pkg-config
$ sudo apt-get install libjpeg-dev libtiff5-dev libjasper-dev libpng12-dev
$ sudo apt-get install libavcodec-dev libavformat-dev libswscale-dev libv4l-dev
$ sudo apt-get install libxvidcore-dev libx264-dev
$ sudo apt-get install libgtk2.0-dev
$ sudo apt-get install libatlas-base-dev gfortran
$ sudo apt-get install python2.7-dev python3-dev
2- Download the OpenCV source code
$ cd ~
$ wget -O opencv.zip https://github.com/Itseez/opencv/archive/3.0.0-rc1.zip
$ unzip opencv.zip
to be able to use SIFT algorithm we need opencv_contrib repository as well
$ wget -O opencv_contrib.zip https://github.com/Itseez/opencv_contrib/archive/3.1.0.zip$ unzip opencv_contrib.zip
$ wget https://bootstrap.pypa.io/get-pip.py
$ sudo python get-pip.py
$ pip install numpy
now let's compile opencv library
$ cd ~/opencv-3.0.0-rc1/
$ mkdir build
$ cd build
$ cmake -D CMAKE_BUILD_TYPE=RELEASE \
-D CMAKE_INSTALL_PREFIX=/usr/local \
-D INSTALL_PYTHON_EXAMPLES=ON \
-D OPENCV_EXTRA_MODULES_PATH=~/opencv_contrib-3.1.0/modules \
-D BUILD_EXAMPLES=ON ..
then start compiling
$ make -j4
if you get any error try
$ make clean
$ make
it will be slower since -j4 command controls the number of cores to leverage when compiling OpenCV 3
$ sudo make install
now let's add the code to raspberry pi and compile c++ project follow the video below and for compiling the code is
g++ -o main main.cpp fruit.cpp -std=c++11 `pkg-config opencv --cflags --libs`
Raspberry pi GPIO
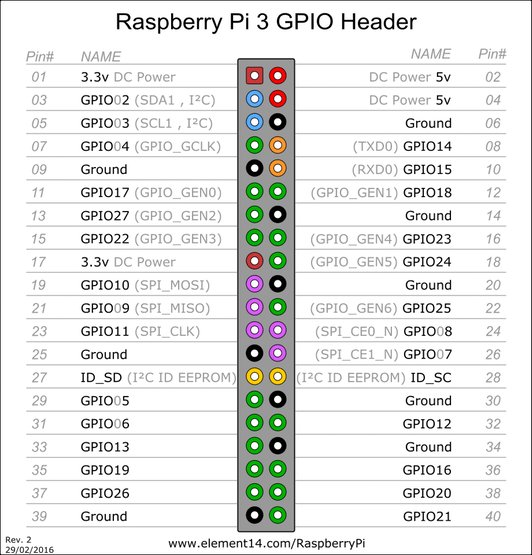
first let's get to know the GPIO headers we will be using :
3.3v (pin #01)
Ground (#06)
GPIO 11 (#23) to read from LDR ( light dependent resistor ) sensor to detect when the fridge door is opened and lights go on the raspberry pi starts capturing frames 1 every 60 frames and save them till the LDR detects that the light turned off in the fridge ( or its door is closed ) then select the frame before the last one to make sure that its not captured during fridge closure (it would be black image)
and deletes the rest of the image and keep this one for processing and sending it with its data to the server where it's saved to sql database and appear on the website after the user logs in with the email used on the device
GPIO 17 (#11) as output to the LED ( which indicates the state of the raspberry pi whether it's capturing frames or not )
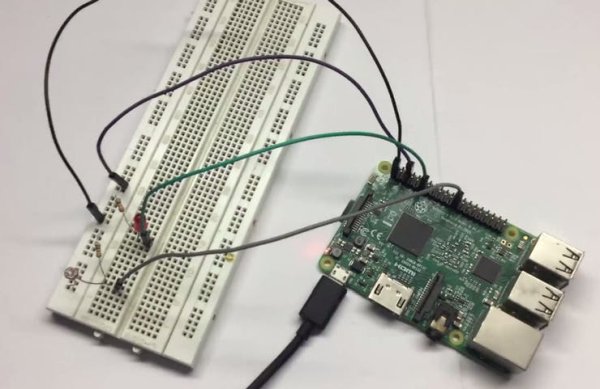
here is the connection before packing inside the case
and the schematic
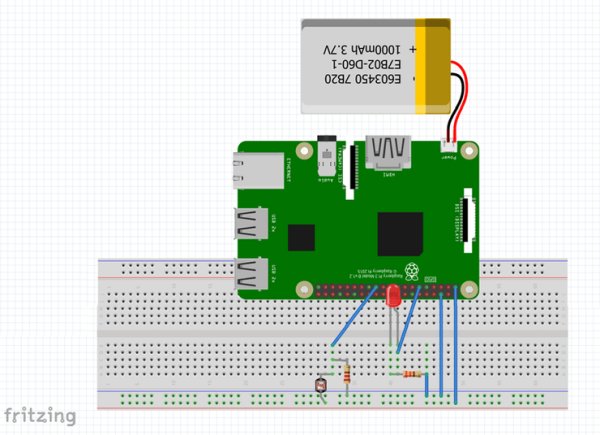
video testing LDR sensor with the LED
Automation Script
automator.py is the file responsible for managing gpio , capturing images , selecting one and removing others , start processing using color detector and sift then send their output to the server with the processed image
how it works ?
while True:
	if (GPIO.input(23) == True):
		newCapture=True
		GPIO.output(11,1)
		cap()
	else:
		GPIO.output(11,0)
		if(newCapture):
			newCapture=False
			select_frame_and_remove_others()
			run_sift()
			run_color_detector()
			send_img_to_server()
			send_data_to_server()
this is the main loop runnig in the script it gets input from lDR when it returns true led turn on and camera starts capturing a frame every 60 frames
cap()
def cap():
	cv2.namedWindow("camera")
	capture = cv2.VideoCapture(0)
	i = 0
	while GPIO.input(23) == True:
		flag,img=capture.read()
		#img = cv.fromarray(im_array)
		if(i%60==0):
			cv2.imshow("camera", img)
			cv2.imwrite('pic{:>09}.jpg'.format(i), img)
			if cv2.waitKey(10) == 27:
				break

		i += 1
else it calls select_frame_and_remove_others() :
	images=[]
	for file in os.listdir("./"):
		if file.endswith(".jpg"):
			#print(file)
			images.append(file);
	images.sort()
	print(images)
	try:
		images[-2]
	except IndexError:
		print("Insufficient Images Captured")
		return
	print(images[-2])
	saved_image = images[-2]
	images.remove(images[-2])
	for f in images:
		os.remove(f)
	print(images)
	print ("saved image =")
	print(saved_image)
	os.rename(saved_image,"frame.jpg")
	copyfile("frame.jpg","./images/frame.jpg")
this function append all jpg files to array and only save the one before the last frame images[-2] and remove it from the array then start deleting every file in the array and rename the saved image frame.jpg so it can be identified by SIFT and Color detector algorithms it also copy it to image folder ( as the Color detector detects from within this folder i made it like this for debugging but it ‘s not necessary at all it )
then calls run_sift() and run_color_detector() we have seen these algorithms before this function only calls their executable files and the python script to run
for exmple run_sift() function
def run_sift():
	os.system('python ./sift/detect.py')
finally send image and data to server handled by 2 separate files also called the same way as run_sift() function from within the automator script
post_img_to_server.py first encode the image to text then send it with post request to the website api endpoint ex:
https://dkyf2jsa9ujaq.cloudfront.net/[email protected]&setimage=/3423rduaheofaedf04u5twi'
send_to_server.py read data from output.txt and data.txt files and send the as get request to the website api endpoint ex:
https://dkyf2jsa9ujaq.cloudfront.net/[email protected]&yogurt=2&cantaloupe=1&tangerine=1
Android Application
you can downlaod it here:
https://raw.githubusercontent.com/piratemrs/Smart-fridge-amazon-dash-php-api/master/app-release.apk
or from the website click “google play icon” it will start downlaoding
it ‘s mobile version of our website with one activity that checks for the email for first time then save it to shared preferences
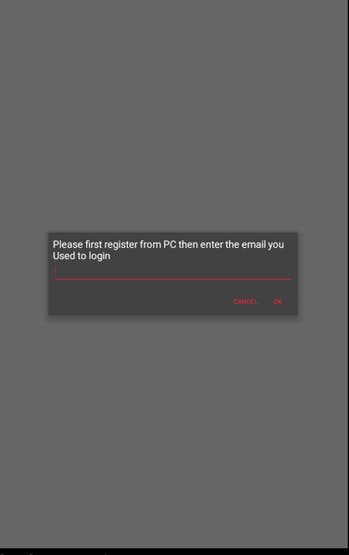
once you enter the same email you used to sign up from the website
https://dkyf2jsa9ujaq.cloudfront.net
the app will open a webview with the url and GET/POST requests for each button so it can be simply compiled to any other platform whether ios or windows phone (but i don't have other phones to test and compile it)
Device Case
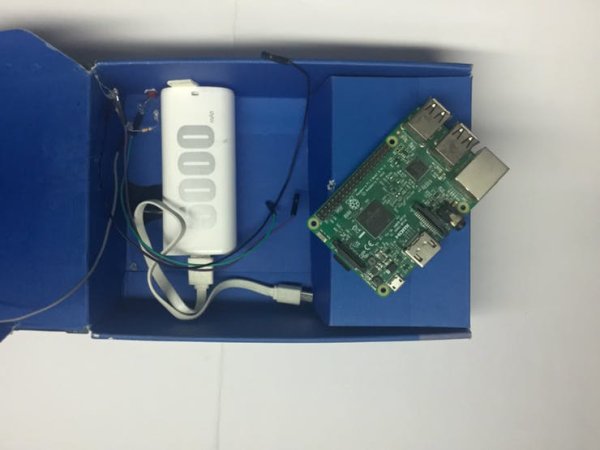
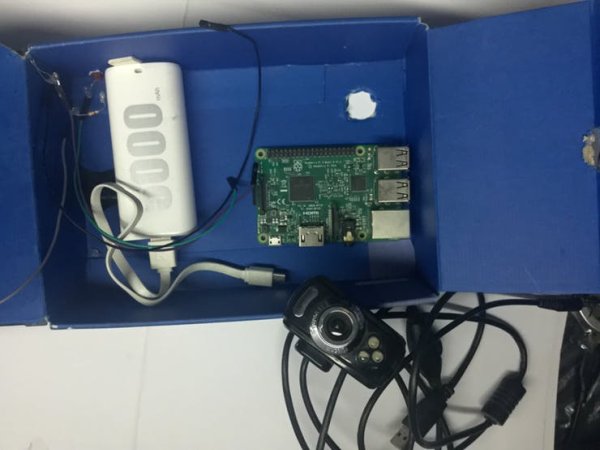
it's an old mobile phone case ( i have modified it a little ) with 3 compartment one for the camera (here i am using a usb camera but i do recommend getting a raspberry pi camera it would be much better for image processing also have wider angle than the one i am using ) another compartment for the power bank and third one for the raspberry pi itself
Installing and Registering the device
install the device inside the fridge as in the picture
( I have tried double side tape , ordinary tape nothing can stick inside the fridge to fix it to the fridge roof i had to use a screw but i didn't want to make it permanent so i went with elastic rope and tied the device to holes inside the fridge )
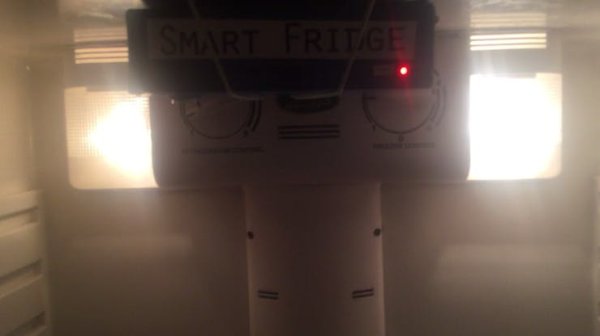
the camera should be facing downward as in the picture
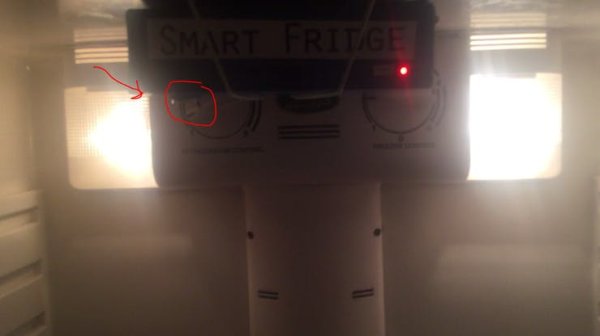
here is a video of the device installed
after installing the device return to registration page :
https://dkyf2jsa9ujaq.cloudfront.net
and click login with amazon button and enter your credentials
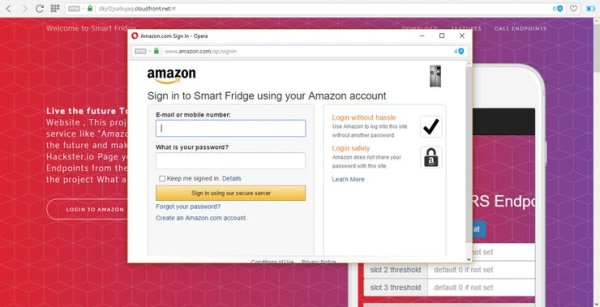
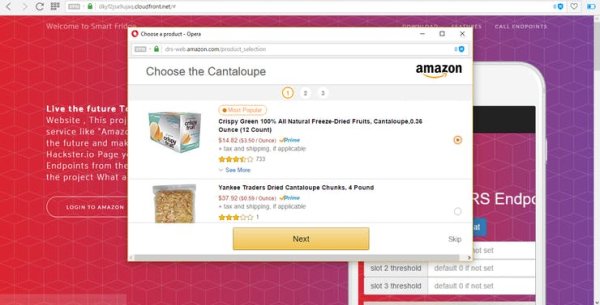
choose product for slot 1 ( I have searched a lot for fresh cantaloupes sold by Amazon.com but only found dried ones other sellers are not yet supported with Dash service so i went with dried one )
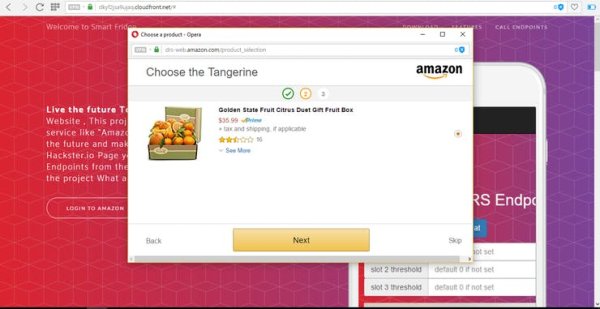
choose product for slot 2 we only have one here
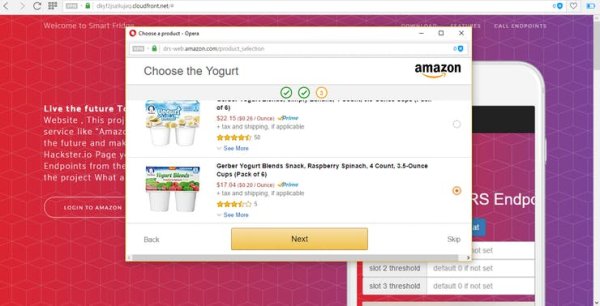
and 3rd slot choose the yogurt then review your address and payment method then click complete setup
after registration run the automator.py script ( with your email in send_to_server.py and post_image.py scripts ) from the raspberry pi , open the fridge for couple seconds and close it ( the camera should now have captured frames and processed their data to the server with the image ) then you will find that the website has saved access token and refresh token and expire time so you won't need to register or login again also on the android app after entering your email for the first you won't be asked again for it and the server will save these data to sql database and use refresh token if expiry time ended and new request was made ( i left these data for debugging and for anyone who want to test each step happing when using the php api but these data shouldn't appear in production )
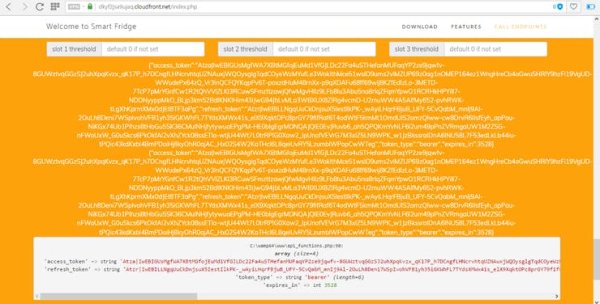
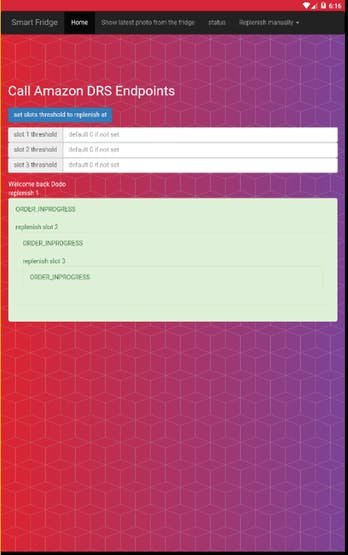
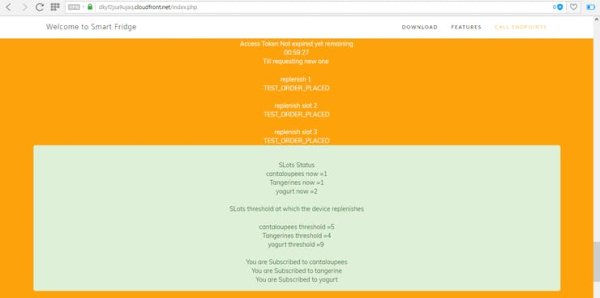
click status button you will see it auto ordered 3 slots as i have set the threshold higher than the detected slot consumption levels (these are test orders you won't be charged for only notified through the email also it would not replenish after registration if no device sent data all values will be 0 and nothing will be ordered unless the device updated the state for the first time )
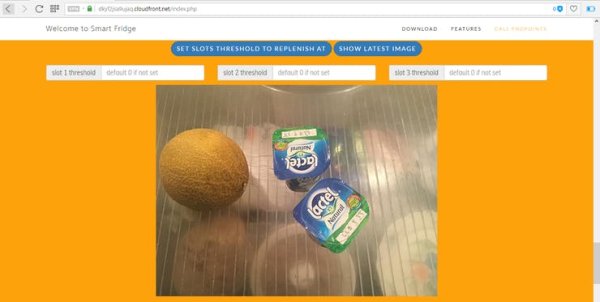
click show latest image to see the latest processed image from the raspberry pi
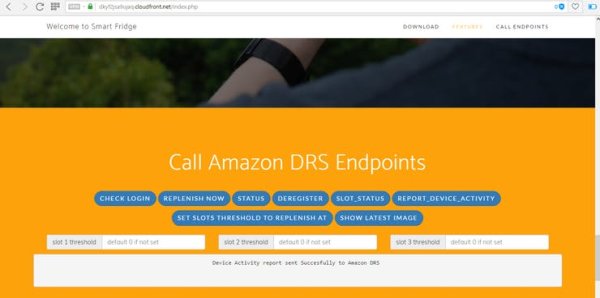
you can also use the php api to report device activity to amazon
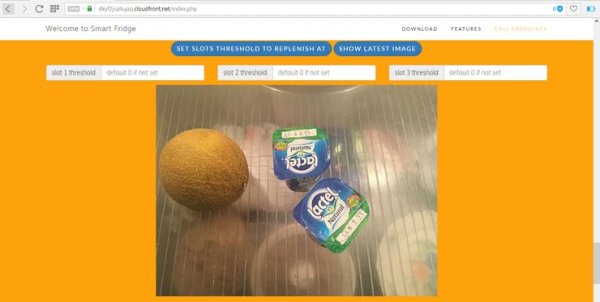
or send slots consumption status all these function will be found in api_functions.php and the response on the website for testing
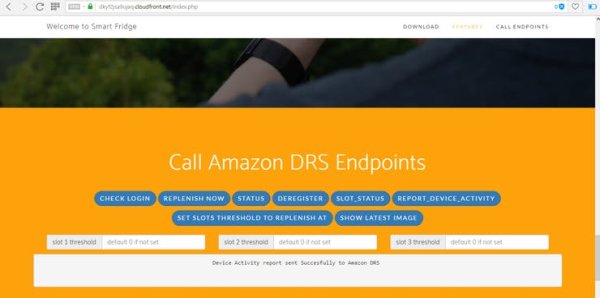
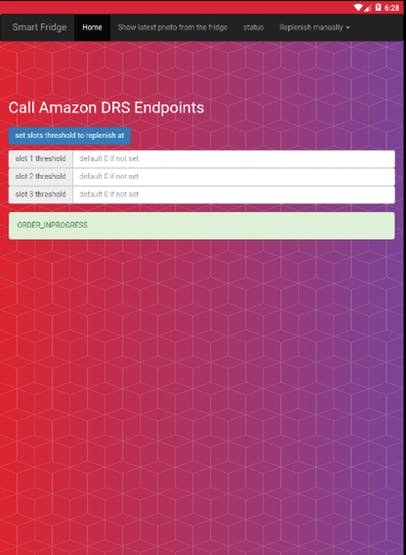
if you click status again you will see “TEST ORDER PLACED” is now “ORDER IN PROGRESS” and you can adjust the threshold at which the device should replenish i have change all 3 slots to 10 and you can see the last line is the response all slots values are now change and they will be saved to the sql database
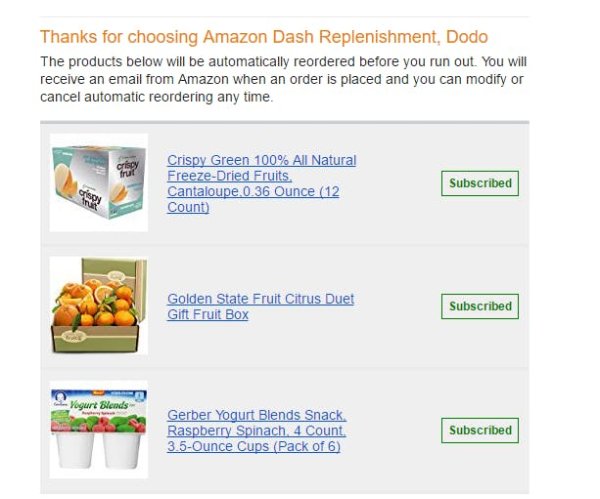
you will get an email after registration about subscription status
and you can manually replenish a specific slot by either entering its name or slot id
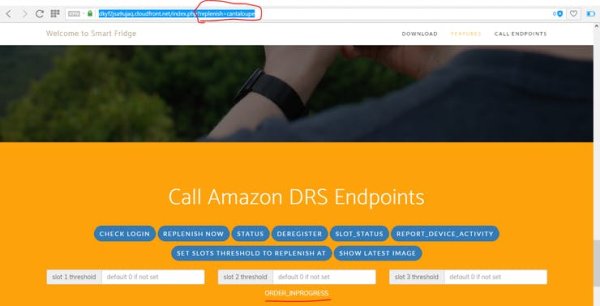
same for yogurt or any other slot
after placing a test order you will also get an email like this indicating that the order is not going to be shipped it's test order
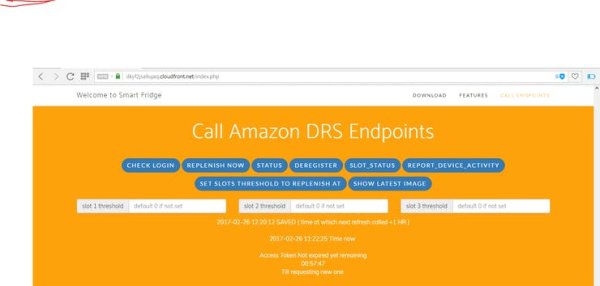
check login button return login status and time till access token expires and needs to be refreshed it will be handled automatically with the server
Hope you like the tutorial feel free to ask for anything about the code or installation and i try my best to respond to your questions .
Thanks
Source:Smart fridge (self-replenishing) + Amazon DRS php API


