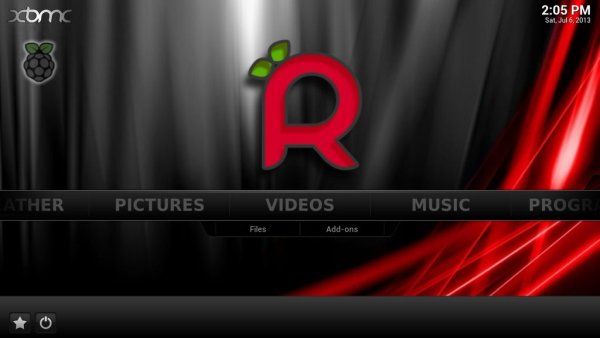
In this instructable, I will show you how to turn your Raspberry Pi into an HTPC with a Linux distribution called Raspbmc.
From the About section of Raspbmc's website:
Raspbmc is a minimal Linux distribution based on Debian that brings XBMC to your Raspberry Pi. This device has an excellent form factor and enough power to handle media playback, making it an ideal component in a low HTPC setup, yet delivering the same XBMC experience that can be enjoyed on much more costly platforms. Raspbmc is brought to you by the developer of the Crystalbuntu Linux Distribution, which brings XBMC and 1080p decoding to the 1st generation Apple TV.
Here’s why you might like Raspbmc:
Free and open source.
Supports both wired and WiFi out of the box!
Multiple languages supported
No knowledge of Linux is needed. If you want to use the Raspberry Pi as an XBMC frontend you can do exactly that with no knowledge of how anything works.
It can be installed with a few simple clicks from a Mac or a PC running Windows or Linux.
It’s auto updating, meaning you constantly get new features, performance and driver updates. You can however turn updates off at any time.
It supports 1080p playback.
Share your content from your PC over NFS, SMB, FTP and HTTP and a USB drive in almost any format.
AirPlay and AirTunes support allow you to send music and video from your iDevice to the TV.
Full GPIO support!
As it is a Debian system, it is completely expansive and you can install any packages from Debian’s massive repository!
… and much more!
Here’s some more ‘advanced’ features:
1080p DTS decoding in software.
Can be installed to SD card, USB drive, or run off an NFS share.
Has the following services embedded:
Samba server
TVHeadend server
FTP server
SSH server
Secure out of the box – iptables restricts network to LAN only by default.
Raspbmc is created and maintained by Sam Nazarko, a 19 year old student from London.
Step 1: Materials
Raspberry Pi
– SD memory card (4GB or larger)
– Power adapter compatible with the MicroB connector on the Raspberry pi
– Ethernet patch cable
– HDMI compatible monitor and cable
– USB Keyboard (no mouse is necessary, you can navigate the entire interface via keyboard. Arrow keys, Enter, ESC, etc.)
Step 2: Installing the Raspbmc on your SD card
In this section I will be going over the simple installation process on a Mac.
First, open a terminal window (navigate to the apple spotlight in the upper right hand corner of your screen and start typing “terminal”. it should be listed as the “top hit”. Click it to open the terminal application.)
When you are in the terminal window, type the following command:
curl -O http://svn.stmlabs.com/svn/raspbmc/release/installers/python/install.py
hit enter
now type the following command:
chmod +x install.py
hit enter
Next we will be running the installation script with root privileges as well as writing to our SD card by using the following command:
sudo python install.py
hit enter
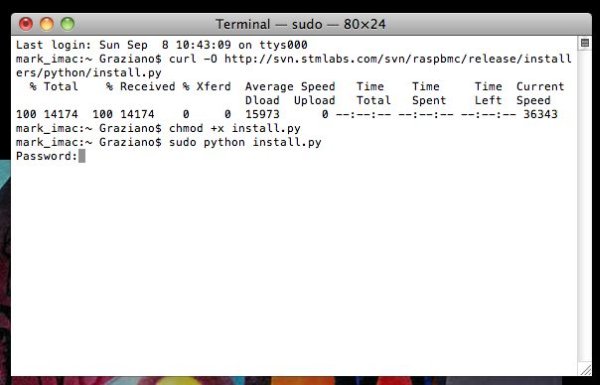
After those commands have run, your terminal window should resemble the photo at the top of this current step. Type in your password (keep in mind, you will not be able to see the characters as they are being typed, the cursor will not move. Don't be alarmed, just type your user password as you would to install any other application on your computer) after your password has been typed, hit enter.
Step 3: Installing the software on the SD card
After completing the final part of the last step (typing your user password and hitting enter) you will be prompted with the Raspbmc installer window. once you have inserted the SD card into your computer, hit enter to continue.
Step 4: Installing the software on the SD card (cont.)
Look for the SD card you are attempting to use, in this case, I am using a 4GB card which we will identify by looking at the “SIZE” column. When selecting which disk you want to use, type in the identifier name for the proper disk. In this case we want to use the 4GB disk which has the identifier “disk1”
For the “Enter your choice here” prompt, type the proper identifier and hit enter. Upon hitting enter, Raspbmc will be installed onto the SD card. It will automatically eject the disk. Upon disk ejection, remove the SD card from your computer, place it in the SD slot on your Raspberry Pi and power on the device. Raspbmc should boot and you should be ready to personalize the user interface and install any add-ons your heart desires!
Step 5: HDMI issue – fix
I personally had an issue of my TV not recognizing the HDMI input for my Raspberry Pi. To solve this issue I logged into the admin interface for my Verizon Fios wireless router, took a look at my network and found the IP address for my Raspberry Pi (it was fairly easy for me because I make a point of naming devices and giving static IP addresses to all network interfaces in my home, so spotting the outlier was obvious). I then used this ip address to ssh into the device to make configurations. In order to ssh into your raspberry pi, use terminal and type the following command:
ssh pi@theIPaddressofyourPi
in my case it would be: ssh [email protected]
you will be prompted for the user password, the default password for your Raspberry Pi is “raspberry” (without the quotation marks).
upon connecting to Pi, navigate to /boot by using the following command:
cd /boot
hit enter
then open up the config.txt file within that directory using the following command:
sudo nano config.txt
(before hitting enter your screen should look like the image above. The extra ls command just lists all the files within the /boot directory.)
hit enter
For more detail: Turning your Raspberry Pi into an HTPC


