
A Raspberry Pi is a powerful computer for its size, making it ideal for applications such as smart speaker installations or media playback. However, the mini-computer can also provide a variety of entertainment for gamers, especially when it comes to older titles.That is the idea behind RetroPie, a combination of multiple emulator projects which combine to create an easy-to-install package for the Raspberry Pi.
This software turns your mini-computer into a fully-fledged gaming console, capable of playing thousands of titles from various retro consoles including the SNES, PlayStation 2, GameCube, and more.
To get started with RetroPie, you will need the following hardware.
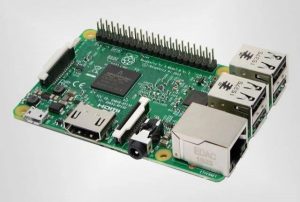
- Raspberry Pi (For best performance use a Pi 3 Model B+)
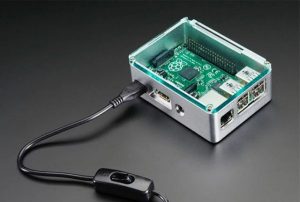
- Raspberry Pi Case
- MicroSD Card
- HDMI cable
- TV or Monitor
- Wi-Fi or Ethernet Cable
- Power supply
- USB controllers
For the purpose of this tutorial, we will assume the installation is occurring on a Raspberry Pi 3 Model B or B+ – which are both powerful enough to make great retro gaming consoles and feature built-in Wi-Fi.
Installation
The easiest way to install RetroPie on your Raspberry Pi is to download the software and write it to your MicroSD card.
First, visit the RetroPie website to download the latest version of the software, and extract the downloaded file.
From here, you will need to use software such as Etcher to write the extracted .img file to your microSD card.
Writing this image is relatively straightforward when using the Etcher program, but more information can be found on the official Raspberry Pi website.
The next step is to connect your Raspberry Pi to your TV or monitor, plug in your peripherals, and place it in its case.
You can then insert the microSD card, connect any controllers you would like to use with your new RetroPie console, and boot up the Pi.
At this point, you can begin to set up your controllers and access the software’s included emulators.
Setup and games
You can configure your controllers for both EmulationStation and RetroArch by following the on-screen instructions upon boot.
The Raspberry Pi will then present you with a menu listing the number of games and platforms available.
While there are many systems emulated on the device, they will only appear once you have installed ROMs for their respective titles.
ROMs can be transferred either via local network Wi-Fi connection or via USB drive to connected storage.
Transferring ROMs via Wi-Fi can be done from within the RetroPie menu or by saving games in a “retropie/roms” directory on a USB drive.
These ROMs should then be accessible and you should be able to play the new titles on your retro console.
It should be noted that ROMs of gaming titles are a legal grey area, and it is illegal to download licensed content which you do not own.
However, it is uncertain whether downloading a ROM of a game you own for the same platform is illegal.
Additionally, there are ways to acquire ROMs legally, such as through Steam emulator collections which included unpacked ROM files.