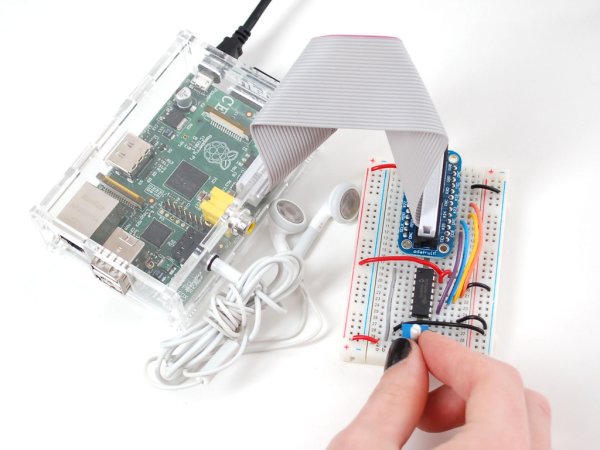
This project shows how to construct a simple MCP3002 Analog-to-Digital Converter (ADC) circuit with a test potentiometer input. It shows how to wire the SPI pins for successful data communication between the ADC and the Raspberry Pi.
Breadboard Build
A breadboard, or “solderless breadboard”, is a tool, which allows engineers to rapidly prototype their circuit ideas without dedicating the components to a permanent circuit board. These boards are available from places such as eBay for around a pound.
The first thing you must learn when using a breadboard is the correct way to hold it and look at it. It is surprising how many times the experts get this wrong. The columns are labelled a through to j, and the rows are labelled 1 to 30. An internal metal strip connects the tie points along a row, hence when you look at it in this way, you can easily visualise the internal connections.
Methodical Approach
You must also use a methodical approach when building on a breadboard. This makes it easier for others to follow your circuit, and it makes it easier for yourself to go over your work to re-check it. If you get into this habit, then it is very useful in the long term when you might be building larger circuits. For example, I once built a complete PC Motherboard on a breadboard measuring 45 cm × 45 cm that consisted of many wires and integrated circuits.
Breadboard Layout
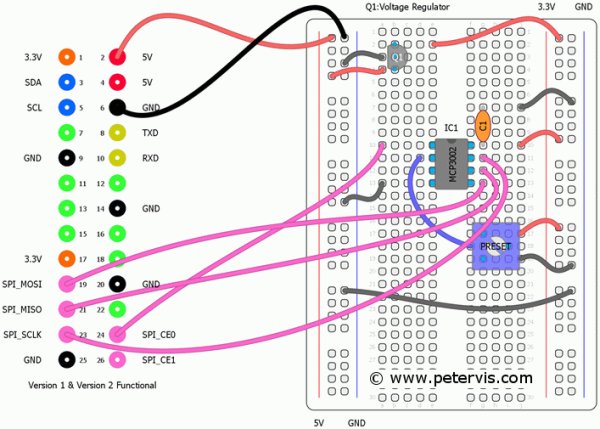
As you can see, the breadboard has power rails on both sides, marked by red and blue lines, which indicate the internal connections of the tie points. The power (+5 V) and ground connect to the left hand side rails. The GPIO pin 2 provides +5 V whilst pin 6 provides the ground.
Voltage Regulator Q1
Q1 is a 3.3 V regulator, which converts the +5 V from the Raspberry Pi into +3.3 V for the MCP3002 IC. The regulated 3.3 V connects to the right hand side rails of the breadboard. Therefore, the LHS rail provides +5 V and the RHS rail provides +3.3 V, and ground is common on both sides of course.
You could of course connect the 3.3 V pin from the GPIO header and avoid the use of an external voltage regulator, however you run the risk of damaging the RPi power supply if there is a mistake in your build.
Capacitor C1
C1 is a 100 nF decoupling capacitor. Be sure to place it close to pin 8 to filter the noise within the power planes.
10 kΩ Preset
The preset track connects across the +3.3 V rail and ground rail, whilst the wiper, which is the centre pin, connects to pin 2 of the MCP2003 IC. Pin 2 is channel 0, however this IC has two channels, and you could connect it to channel 1, which is pin 3. Just make sure that your software is set to read the correct channel that you are using.
SPI Connections
Pins 1, 7, 6, 5 on the IC are for the SPI communication, and pink coloured wires connect them to pins 24, 23, 21, 19 respectively on the Raspberry Pi GPIO header. Previous pages of this article documents this part of the circuit.
Connecting Wires
For the connecting wires, I am using breadboard breakout wires, which are readily available on eBay. I managed to get a male-to-female multicoloured ribbon cable for a pound and it came all the way from China.
This Article Continues…
How an Analog-to-Digital Converter ADC Works
Raspberry Pi ADC: Analog to Digital Converter Chip MCP3002
Raspberry Pi Analog Input Circuit
Raspberry Pi LDR Light Sensor Circuit
ADC Circuit: Raspberry Pi Analog Input Circuit on Breadboard
MCP3002
Raspberry Pi SPI
Raspberry Pi Pinout
For more detail: ADC Circuit: Raspberry Pi Analog Input Circuit on Breadboard


