
This guide will help you set up Home Assistant. Access it from any web browser and automations.
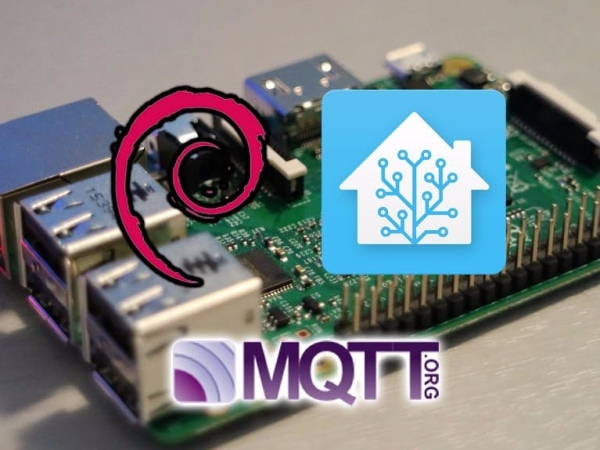
Home Assistant
Home Assistant is one of the most versatile and powerful home automation platforms and it is completely open source. Once set up, it can be accessed from any web browser and allows you to create complex automation that puts services like IFTTT to shame.
One of the things that I like most about Home Assistant is that it all works on my local network. No more remote APIs or giving your data to other people all while slowing down your internet. You control your data, including what stays local, and what can be accessed remotely.
This entire system can be run on a Raspberry Pi, meaning that your personal smart home’s brain will run you about $35.
The following guide will walk you through the basic steps involved with setting up your own Home Assistant server with MQTT support.
What You Will Need
- One 4GB (or higher) SD card
- One Raspberry Pi (B+, PI 2, or PI 3)
- 5V 2A Power Supply with MicroUSB Cable
- Laptop or Desktop computer
- One network router with multiple Ethernet ports
- One Ethernet cable.
Let's Get Started
- Download the HASSbian disk image from here.
- Use any Disk Imaging software to install the HASSbian image onto the SD card that you will use with your Raspberry Pi. (Win32DiskImager or Etcher)
- Connect your Raspberry Pi to the internet via the Ethernet port.
- Internet connectivity is needed when the Hassbian SD card is first installed into your Raspberry Pi.
- Insert the HASSbian SD card into the Raspberry Pi and connect it to power.
- When first starting up, the Raspberry Pi will connect to the internet and start to download Home Assistant. This can take as long as 30 minutes depending on your internet speed.
- While Home Assistant is downloading, open a new browser window on your computer.
Find the IP Address of Your Raspberry Pi
Before we can do anything with your new Home Assistant install, we need to know what IP address your router has assigned to the Raspberry Pi. There are a few ways to do this, but the best way is to gain access to your routers administrative page.
Find Your Router’s IP Address
Typically, your home router should be at IP Address 192.168.1.1, otherwise known as your Gateway Address, but this address can be changed by an administrator. The easiest way to find your router’s IP address is to figure out what Gateway your computer is connecting to.
Windows:
- Click the search box from the Start Menu or in Cortana.
- Search for CMD to bring up a command prompt window.
- In the new window, type ipconfig.
- Press Enter to send the command.
This will display the information about your network connection. The IP address listed next to Default Gateway is the address for your router.
Mac:
- First, click the Apple icon in the top left corner.
- Click System Preferences from the menu.
- Next, click Network.
The IP address next to Router is the one you want.
Connect to Your Router
From your web browser, type the IP address for your Router into the address box just like you would for a website.

This should take you to the login page for your router. Each router will have it’s own menu system, but every one will have a way to see what devices are connected to it.
Your Raspberry Pi should show up as Hassbian in the list of devices. Take note of the IP address that is assigned to it because that is how we will connect from now on.

While you are here, you may want to reserve the IP address for Hassbian so that it is always the same. Your router’s help guide should tell you how to reserve the IP.
Connecting to the Home Assistant UI
Hopefully everything has downloaded by now and you should be able to access the Home Assistant UI by typing in the IP address assigned to your Raspberry Pi, followed with :8123 to connect.

If The Home Assistant page fails to load, just wait for a bit longer as the HASSbian update may not be completed. Go and get a snack, then refresh your browser window until the page loads.
Once the page loads, that means that everything is set up for the basic install.
Home Assistant should start to detect all of the name brand IOT devices that you may have connected to your local network. However, we will need to do some other things to get DIY devices like the ESP8266, NodeMCU, or other devices that require MQTT.
Customizing Your Server
We can SSH into our new HASSbian server by connecting to the IP address assigned to the Raspberry Pi at port 22.
The default login is pi and the password is raspberry.
First, let us change the password so that others cannot connect to your server’s administrative account by running the following command.
sudo passwd pi
You will be prompted to enter a new UNIX password. Remember that this password is case sensitive. This is the ROOT access password for your new server. It is very important that you remember this password and never give it out to anyone that you do not trust fully.
Now we want to update the Time Zone.
Run the following command.
sudo raspi-config
This will open the Configuration screen.
- Use the arrow keys to scroll to Localisation Options, then press the Enter key.
- Scroll to Change Timezone and press Enter.
- Scroll to your geographic location and press Enter.
- scroll to your time zone and press Enter.
- Scroll to Finish and press Enter.
Setting up WiFi
At this point, you can set up WiFi access if you are using a Pi3 or have a USB WiFi device connected to your Raspbery Pi. It is not necessary, but can be helpful if you do not want to be connected with a hard line.
sudo nano /etc/wpa_supplicant/wpa_supplicant.conf
Go to the bottom of the file and add the following:
network={
ssid="testing"
psk="testingPassword"
}
Then run:
sudo reboot
Disconnect the Ethernet cable and your Pi should now connect via WiFi. You will have to find the IP address again as it will have changed, but you can connect to it normally.
Installing Support scripts
Support scripts will add functionality to your Home Assistant server.
Samba support
First, let’s install Samba to make it easy to share files from the Pi.
sudo hassbian-config install samba
Once finished you should be able to see the Raspberry Pi as a shared drive that you can access just like any other disk. This will make it easy to update your interface files later.
Note: if the Raspberry Pi dose not show up as a Network drive, try entering a \\ followed by the IP address of the Raspberry Pi in the navigation bar at the top of the file browser window.

MQTT is a communications protocol that is typically used in IOT devices and is most common with DIY electronics using the ESP8266. It is fast, secure, and highly versatile for machine to machine communication.
Mosquitto is an MQTT server that will work along side your Home Assistant UI. Together, there is no end to what can be accomplished between your devices.
sudo hassbian-config install mosquitto
You will be asked to enter a User Name and Password for access to the MQTT server. This will be the User Name and Password that all connected MQTT devices will have to use if they connect to your server.
You can test your MQTT connection with the following code replacing the MQTT Username and MQTT Password with your MQTT username and password.
mosquitto_sub -d -u MQTT Username -P MQTT Password -t test/#
If You are Having Issues with MQTT
If you are having authentication issues, run the following code to update the MQTT user accounts. Be sure to replace the User part at the end with the user name that you are using for MQTT.
sudo mosquitto_passwd -c /etc/mosquitto/passwd User
and
sudo mosquitto_passwd -c /etc/mosquitto/pwfile User
This will ensure that your user account and password are set.
sudo service mosquitto status
This will show the currant status of your MQTT service. If the section listed as Loaded ends with “disabled”, do the following steps.
 sudo systemctl enable mosquitto
 sudo reboot
This will re-add Mosquitto to the list of programs to execute on restart. This has been known to be broken when an update occurs.
So Many Support Scripts
This is all you really need to get started with things. There are many more scripts that can be installed and a full list can be found here and even more here.
- Bluetooth Tracker
- Raspberry Pi GPIO
- Raspberry Pi Camera
- One wire Sensor
- CEC support (for HDMI)
- OpenZWave
- Tellstick
- IKEA Trådfri Gateway Samba Support
So What Now?
Any device connected to your local network can now access the Home Assistant UI. You may see a few things appear in the UI like Hue lights, Nest, Chromecast, Plex, and a few other name brand IOT products.
In the next tutorial, I will walk you through customizing the UI and adding devices not supported by the auto detection function of Home Assistant.
If you can’t wait until then, here are a few links to more tutorials and information that I used to create this guide.