A rapidly deployable distributed Wi-Fi IEEE 802.11s mesh communication network with cellular modem Internet access for emergency disasters.

Features
- Internet access via a USB cellular modem
- Wi-Fi IEEE 802.11s mesh distributed communications
- 3D printed water-proof enclosure
- Open source software, open hardware
- Compact
- Long range open hardware omni directional antenna (up to 1 km between nodes)
- Inexpensive
Description:

This system provides instant Internet access over a wide area and can be deployed in a few minutes during emergencies such as the recent hurricanes in the Caribbean and US or the earthquake in Mexco City. The system self-configures creating a Wi-Fi Access Point network backplane reachable from common mobile devices. Network packets are automatically routed to the nearest node with Internet access via a cellular modem.
The system can be expanded by adding satellite nodes as needed. Multiple cellular modems can be used and clients will be automatically routed to the modem equipped node with the lowest wireless routing cost.
This system provides voice, email, and web communications over large areas in the event of a local disaster or emergency situation. It is easily and quickly deployed requiring no prior setup by the user. It is built from off-the-shelf hardware and software with open source additions for the communications portions. The waterproof case and antenna are open source 3D printed STL files that can be printed on any 3D printer capable of PETG, nylon, or high temp PLA filaments.
How to make it yourself:
It is relatively easy to create this system yourself. However you will need a couple of tools:
- A 3D printer capable of PETG or nylon filament.
- Conductive paint or have the ability to copper plate plastic objects
- A raspberry pi zero
- A wireless modem.
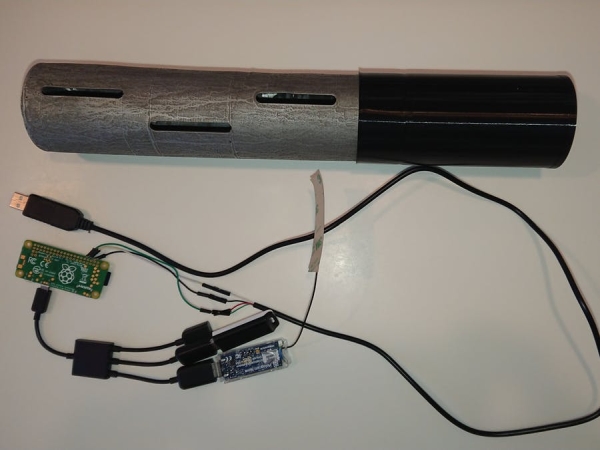
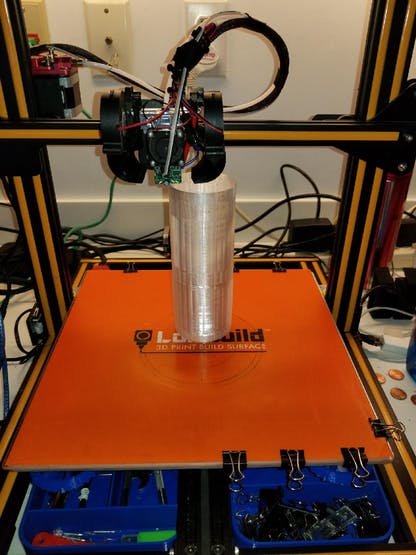
Step 1 is to print the antenna and base. Both can be printed without any supports. We recommend using PETG, Nylon, or high temperature PLA for the print. The base will house your wireless USB modem, Wi-Fi USB dongle and Raspberry Pi. The STL files can be found here. https://www.thingiverse.com/thing:2747605

Step 2 is to either paint or copper plate the antenna. We recommend using MG Chemicals Nickel for the conductive paint. For the materials for copper plating we used baking soda, 1.5 liter soda can, distilled water and four AAA batteries for voltage. (For copper plating instructions follow this youtube tutorial)
Step 3 is to setup your Raspberry Pi. Download the provided Raspbian image and write it onto a mini-SD card. Place the SD card into your Raspberry Pi and attached the Raspberry Pi to a Wi-Fi USB dongle and wireless USB modem.
You can use any Wi-Fi USB dongle that contains a Ralink RT3572 or RT5572 chipset that uses the Linux Rt2x00 driver or a Qualcomm Atheros USB chipset that uses the Linux ath9k-htc driver.
Step 4 Almost done! Place the wireless modem into the rectangular socket inside the base that extends into the antenna. Make sure your Raspberry Pi is connected and provide it a power source. Now your device is complete and ready in case of any emergencies.
The antenna design was inspired by the 12-slot Waveguide antenna video created by Andrew McNeil. Slotted waveguides produce horizontally polarized high-gain output with a simple structure suitable for 3D printing.
The Wi-Fi USB dongle fits into a waterproof pocket in the 3D printed antenna base. When the antenna is fitted onto the base, the USB dongle's on-board antenna acts as the RF radiator into the waveguide antenna.
The Raspberry Pi image is based on the latest Rasbian image file with some key additions. Unfortunately the current version of Raspbian's Wi-Fi daemons do not support IEEE 802.11s mesh networking. They also do not have protection from the recently discovered Krack attack. So we patched the source code and compiled our own version of wpa_supplicant and hostapd V2.6. These daemons provide mesh network and Wi-Fi Access Point capability.
We also developed a custom network initialization script that runs a Wi-Fi access point with SSID “ECM-MESH” on 2.4 GHz channel 1 by default. This script is designed to be easily modifiable to use any of the available Wifi channels.

