
Disclaimer: The following article is intended for users comfortable working on Linux based machines.
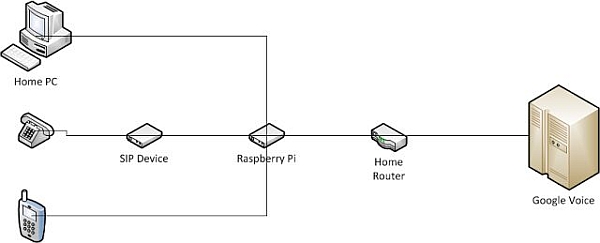
In this article I'll review the steps I used to configure a VoIP landline using a SIP interface through a Raspberry Pi based PBX with Freeswitch and Google Voice. In other words, a free landline!
I spent the better part of the weekend reading wiki's, blogs, manuals and other posts and had to piece them all together to get my own personal solution working. I thought it would be useful to write it up and share my experiences.
I've tried to capture my steps as best as I could . Please let me know if anything does not work or needs to be amended.
NOTE: You do not have 911 capability with this solution.
Step 1: Things you'll need
– A Raspberry PI with “wheezy-raspbian” connected to your network. Please see the Raspberry Pi Wiki for instructions on how to set this up.
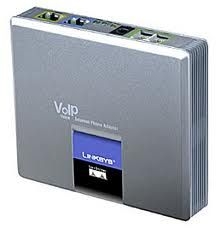
– A physical SIP device or software, like XLITE. I'm using an old Sipura SPA-2100. One end connected to your physical phone line and the other to your network. If you decide to use a software solution, like XLITE, then this isn't a “true” landline replacement because you'll need your PC always on. Using a SIP device, allows
– A Google voice account.
– Test your Google voice account, try calling a number from the web UI.
Then log into Google Voice:
– Click on Settings > Phones
– Uncheck all phones
– Check Google Chat
– Log out of gmail ( Or turn off chat at the bottom of the gmail page)
Step 2: Get Started
Install dependencies on your Raspberry pi.
#apt-get install autoconf automake gawk g++ git-core libjpeg62-dev libncurses5-dev libtool make python-dev gawk pkg-config libtiff4-dev libperl-dev libgdbm-dev libdb-dev libssl-dev
Download, Compile and install freeswitch. NOTE: This step takes a few hours to compile.
#mkdir /usr/local/freeswitch
#useradd freeswitch -d /usr/local/freeswitch
#chown -R freeswitch:freeswitch /usr/local/freeswitch
#cd /usr/local/src
#git clone git://git.freeswitch.org/freeswitch.git
#cd /usr/local/src/freeswitch
#./bootstrap.sh && ./configure –prefix=/usr/local/freeswitch && make clean && make clean modwipe && make && make install
Make sure the following line is present and uncommented in/usr/src/freeswitch/modules.conf
endpoints/mod_dingaling
And build mod_dingaling:
#make mod_dingaling-install
Make sure mod_dingaling is not commented out in fileconf/autoload_configs/modules.conf.xml
<load module=”mod_dingaling”/>
Edit the conf/jingle_profiles/client.xml and replace all its contents with the following. Then replace only the highlighted fields with your Gmail username and password.
<include>
<!– Client Profile (Original mode) –>
<!– to use this profile take the x- away from the open and close tags so its <profile> and </profile> –>
<include>
<profile type=”client”>
<param name=”name” value=”gtalk”/>
<param name=”login” value=”[email protected]/talk”/>
<param name=”password” value=”GMAIL.PASSWORD”/>
<param name=”server” value=”talk.google.com” />
<param name=”message” value=”Thanks Google!” />
<param name=”dialplan” value=”XML”/>
<param name=”context” value=”default”/>
<param name=”exten” value=”2001″/>
<param name=”rtp-ip” value=”auto”/>
<param name=”auto-login” value=”true”/>
<param name=”sasl” value=”plain”/>
<param name=”server” value=”talk.google.com”/>
<param name=”tls” value=”true”/>
<param name=”use-rtp-timer” value=”false”/>
<param name=”vad” value=”none”/>
<param name=”candidate-acl” value=”wan.auto”/>
<param name=”local-network-acl” value=”localnet.auto”/>
</profile>
</include>
For more detail: Free Landline Using Google Voice and a RaspberryPi