
Did you ever wanted to know what's going on in your room, when you're not at home?
Did you ever wanted to know who's entering your room and grubbing around in your things?
Did you want to have a robot friend you can send messages and who would answer?
So then I got news for you: It can be done with a raspberry pi and only a few extra parts!
Come on let's do it!
Don't be afraid of the many steps. Some you can skip, others are information only. This is no a to z receipe, but a list of hints what can be done and how!
Step 1: Gather the parts
What do you need: (with the prices I paid)
- Raspberry pi B or B+ or 2 (35.- €)
- at least a 8GB SD-Card (lot space for pictures…) (5.-)
- the IR-camera for the pi (25.-)
- a wifi-stick for the pi (8.-)
- a PIR-sensor (ebay 3.-)
- a IR-LED floodlight (5.-)
- a darlington-transistor and two resistors (e.g. BD649 and 10k and 2k)
- a step-down-converter 12V to 5V (LM2596 DC-DC adjustable Step-Down ebay 3.-)
That's it.
Optional you can add some other sensors like a temperature-sensor or some noise-activated sensor or a light barrier.
And you can of course start without the PIR and the floodlight an later add it to the setup. If you only want some chatterbot, you don't even need the camera.
Step 2: Start with a virtual machine (optional)
Well this instructable has many different aspects: Hardware, software, python, lua, messenger. And I'm pretty sure at some point I forgot to mention some important step. So take this instructable not as a receipe but as a collections of hints what can be done and how. Then go out an figure it out by yourself.
So let's start with the software:
For 90% of the software development, I didn't use a real raspberry pi, but a virtual machine raspi. I tried to set up a virtual raspi some time ago, but then didn't know what to do with it. Because obviously you can't access the camera in a virtual raspi, nor the GPIOs or set up a virtual wifi hotspot. So what the heck?
Well for this instructable a virtual machine is really coming in handy! With a virtual pi, you can develop all the software with just your computer. No additional raspi, power, display, keyboard. No hustle with the wifi, connection, power-cords and so on. But of course you can do all the steps with a real raspberry pi too.
To start a virtual raspi you need:
- Qemu
- a raspberry Pi image
- a windows-PC with some GB free space
I roughly followed this tutorial to set up the virtual raspi: http://xecdesign.com/qemu-emulating-raspberry-pi-the-easy-way/
It is not really difficult and you find a lot of good tutorials. The main thing is that during the first boot, the name of the partitions have to be adjusted, because the raspi is not running on a sd-card but straight from the image-file.
This is the final line which starts my virtual raspi:
qemu-system-armw.exe -kernel kernel-qemu -cpu arm1176 -m 256 -M versatilepb -no-reboot -serial stdio -append “root=/dev/sda2 panic=1 rootfstype=ext4 rw” -hda 2015-01-31-raspbian.img -redir tcp:5555:10.0.2.15:22 -redir tcp:80:10.0.2.15:81
The -redir tcp-commands make sure the virtual raspi gets connected to the network.
Once the raspi starts, you can either log on in the QEMU window, like you would in an external raspi, or you could connect via ssh. Maybe you have to enable ssh with the “sudo raspi-config” command.
Step 3: Set up the real pi
Well the real pi will surely have to be set up for the final thing, so If you want to skip the virtual machine, do it!
You need to install the image to the sd-card, boot the raspberry and connect it to your local network. This can either be done by ethernet or by wifi.
I prefer wifi, because it gives me the freedom to move the pi around in the house.
For the first setup of wifi you need to somehow connect to your pi. This can be done by adding a keyboard and a display to your pi, or connect it with a cable and use ssh, if enabled.
There are so many different tutorials about these steps, that I don't describe them in detail here.
Finally you should have a raspberry pi running and be able to connect to it with ssh from your computer.
If you plan to do more stuff with your raspberry pi, make a backup of the current system and start with this image instead of the default one. This way you don't have to adjust wifi every time! It's already there.
Step 4: Mobaxterm
Mobaxterm is one of the best xterminals for windows. It doesn't require installation and provides an X-server and a tabbed ssh-client on windows.
When using a virtual raspberry pi with qemu, you have to connect to the virtual machine using the “-p 5555” parameter. Even though the virtual machine tells you a completely different IP-address.
And my favorite feature of Mobaxterm really is the remote editing. You can right click any file on the remote connected system and open it with an editor on your pc. There are a lot good full-featured editors on pc with syntax highlighting and code-completing and many things more. OK, there might also be those features on the raspberry pi, but now over ssh. I personally prefer sublime text for editing, because it is really fast and provides a perfect gui. If you change something and press save, Mobaxterm asks you if you want to update the remote file too. If you select “autosave”, the file is updated every time until you close the editor.
You can use your 4k-display, some kind of weired developer studio and update the files on the raspberry with a click and a smile. 🙂
O.k., working with vi in a 640×480 pixel ssh-window might be also fast, but this really boosted my productivity!
Step 5: Update and upgrade
Well the first thing after setting up a new raspberry pi is to change the default password for the user pi and to update the software.
The password can be reset with the command:
passwd
or via:
sudo raspi-config
After that you should update the software. I prefere to remove the wolfram-alpha engine from the original image before doing this, because it frees at least some 500MB and I don't need it. You can remove it with and then update it:
sudo apt-get remove wolfram-engine
sudo apt-get update

sudo apt-get upgrade
Step 6: Add the messenger
This is the key to the security-raspi: A console based messenger for linux: telegram.
Well this messenger is also discussed a bit controversial, because just like whatsapp it uploads all contacts on your phone and compare them to the database on the server. Then the messenger tells you which friends have the messenger too.
On the other hand: The messenger is completely free of charge (better than whatsapp) and it provides secured chats. And an installation on the raspberry pi will surely not steal any contact information! 🙂
To get telegram running on the raspberry just follow this good instructables from emme shop:
http://www.instructables.com/id/Telegram-on-Raspberry-Pi/ or
http://www.instructables.com/id/Raspberry-remote-control-with-Telegram/
And I remember that I had to install some additional libaries to get the lua script working: sudo apt-get install lua-lgi libnotify-dev
But before you register the client, take the time to read the next step!
Step 7: Secret trick to register telegram on your pi
If you finally want to communicate with your security-pi, then the telegram messenger needs it's own identity.
One way to achieve this is to use a landline phone to register the raspberry.
After entering
bin/telegram-cli -k tg-server.pub
when asked about your phone-number, just type your landline phone number (with country-code and city-code) and press enter.
Then you are asked to enter the code or type call to get called. This is what we do now. Type in call and receive a phone call with a computer voice telling you the code. Write it down or enter it directly. Now the ID is registered to this phonenumber.
This is the only time you really need this phone-number.
The ID-information are now stored on your raspberry pi in the directory /home/pi/.telegram-cli
You can copy this whole directory and take the ID to another raspi or make a backup.
Step 8: Test the messenger
If you are still connected with your raspi, then your messenger should be active by now.
If not start it again with the command:
bin/telegram-cli -k tg-server.pub
Then use your phone with the telegram-app or install the desktop-version and send some messages to the raspberry.
Step 9: Script the messenger
The lua script is the brain of the raspberry pi telegram installation.
The default-script has a lot of functions in it. I suggest that you fill in every function a command like:
print("Hello this is function (replace with name of the function)")
This way you can see which function is called when. Start the script-version with
bin/telegram-cli -k tg-server.pub -s test.lua
and see what is happening.
The most important functions may be:
- function on_msg_receive (msg)
- function on_get_difference_end ()
- function cron()
The first is obviously always called when a message is received. But not only this, it is also called when telegram displays a message that we sent! That's why there are the following lines in the function:
-- if this is a message from us to anyone else, skip interpreting
  if(msg.from.id == our_id ) then
       return
  end
That means, if the message was sent from the raspi, then skip the rest of the function and return.
The second is called when the synchronisation ended. This is special for telegram, because the chat is backuped on the server and if you connect with another device, all chats are updated on this device.
The third is like the linux-cronjob and can be used to do things from time to time.
Step 10: Extended Ping – Pong
The script has the typical ping-pong-function already installed, that means if you send ping to the client running on the script, it will send you a pong back. You can do this for hours… 🙂
If you want a reaction to different words you have to add some if-statements.
With some few words more this can get quite confusing. And you can not combine words or commands. The command has to be send as programmed. If you would send “Ping” instead of “ping” nothing would happen, because this is not the same word and the message text is compared with == to the string “ping”.
Another possibility to find command-words in the message is to do this:
functionsnamen = { "help", "time" , "clock", "pid", "temp", "ping",
                    "start", "stop", "uptime" }
functionen = { sendhelp, sendtime, sendtime, sendpid, sendtemperature, sendping,
                startsecuritycam , stopsecuritycam, senduptime }

function checkforcommand( TOID, FROMID )
  for i, name in pairs(functionsnamen) do
    --print( i.." "..name)
    if ( string.find(string.lower(commandstringarray[1]) , name ) ) then
      --print("Command: "..name.." found.")
      functionen[i]( TOID, FROMID, commandstringarray )
      return
    end
  end
end
— in lua means comment. For the two lines above you can remove the comments and see what happens inside the function.
The checkforcommand is called from within the on_msg_receive with this:
if (msg.to.id == our_id) then
    checkforcommand( msg.from.print_name , msg.from.id )
end
There are two arrays, one for the command to send called “functionsnamen” and the other one for the functions in the lua-script that are called in case one command is found.
With the string.lower() we convert the commandstringarray[1] to lower case and compare it to functionsnamen. This way it makes no difference if we write “Ping” or “pINg” or “PiNG” or anything like that.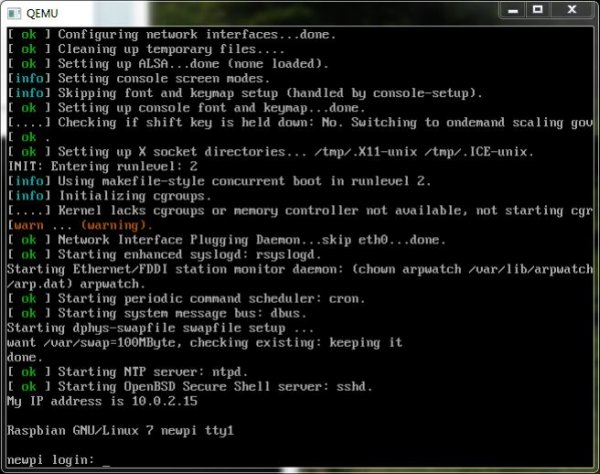
You might have noticed that there is the commandstringarray. This has the following function: After receiveing a message, the complete text is parsed into this array. This way I can check if the first word of the message was “ping” and the second was something else and so on.The commandstringarray is an array of strings. Lua is quite easy with the variable-types and array-types.
To get the message into this array I wrote this function, which is obviously called before checkforcommand:
commandstringarray = {}

function messagetextinstringarray(msg)
  commandstringarray = {}
  leerzeichen = 1
  count = 1
  completestring = msg.text
  -- print( "checkfunction called: msg.text ist: "..completestring )
  leerzeichen = ( string.find(completestring, "%s" ) )
  while leerzeichen ~= nil do
      commandstringarray[count] = string.sub(completestring, 1, leerzeichen )
      -- print("a space found. Partstring: "..commandstringarray[count])
      completestring = string.sub(completestring, leerzeichen + 1 )
      count = count + 1
      leerzeichen = ( string.find(completestring, "%s" ) )
  end
  commandstringarray[count] = completestring
end
the loop is looking for a space ” ” separating two words and writes the partstrings to subsequent indexes of the array.
Step 11: Get the raspberry to do something: send the uptime
Now we don't only want the lua-script to answer us. Sometimes we even want to get some information back from other parts of the raspi.
This is mainly done by bash-scripts.
If you want to know how long your raspberry pi is already running since the last reboot you can just enter
uptime
in the console and get some dates and loads back like:
10:40:47 up 3:33, 0 users, load average: 0,32, 0,13, 0,07
So if you want to send this information via telegram just call this function:
function senduptime( TOID )
  local handle = io.popen("uptime")
  local result = handle:read("*a")
  handle:close()
  --print( result )
  send_msg ( TOID , result, ok_cb, false)
end
Step 12: Own commands: Send temperature
The same applies if you want to issue own commands like send the temperature.
When the command “temp” is received, the following function is called:
function sendtemperature( TOID )
 local handle = io.popen("/home/pi/telegram/temp.sh")
  local result = handle:read("*a")
  handle:close()
  -- print( result )
  send_msg ( TOID , result, ok_cb, false)
end
The shell-script temp.sh itself contains this:
#!/bin/sh
echo "scale=3; $(grep 't=' /sys/bus/w1/devices/w1_bus_master1/28-00044a4203ff/w1_slave | awk -F't=' '{print $2}')/1000" | bc -l
This line reads a DS18B20 digital temperature sensor and echos the result. Because we are reading the result and sending itself as a telegram message we finally receive the current temperature via telegram. Cool huh?
For more detail: Make a secret IR-camera security raspberry pi unit