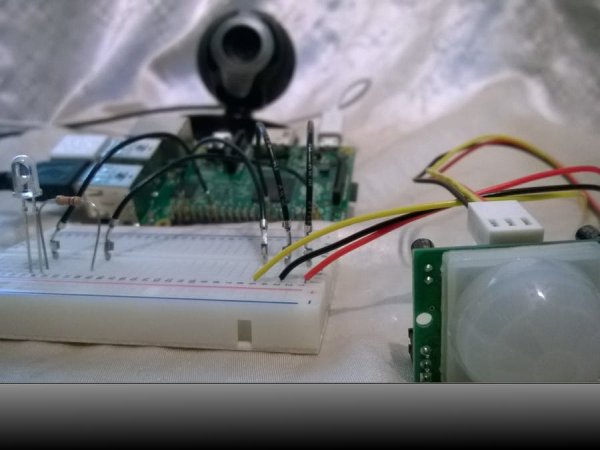
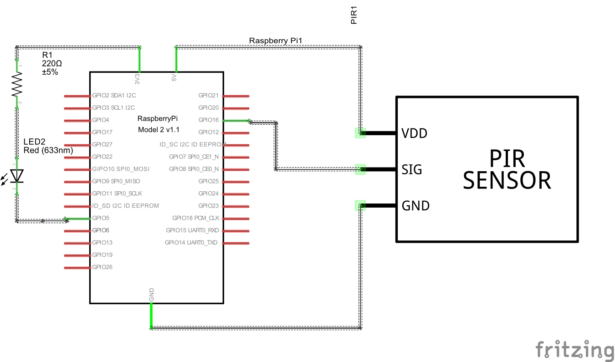
In this project we will use a Raspberry Pi 2 running Windows 10 IoT to monitor a PIR motion sensor that triggers a USB webcam to snap a picture and upload it to Microsoft Azure Storage using C#. Additionally, we’ll wire up an LED as a simple status indicator. We’ll also create a Microsoft Azure Web App website to view the pictures remotely from any internet capable device.
This project is intended for beginners interested in learning more about Windows 10 IoT running on a Raspberry Pi 2, and/or Microsoft Azure Services. It assumes you have some basic knowledge of C#, though not necessarily around Raspberry Pi or Azure/ASP.NET programming. All of the code in this project was written in the free version of Microsoft’s Visual Studio 2015 Community Edition (the single best IDE ever produced, hands down).
This project can be seen as having the following distinct parts:
• A motion detector piece (PIR sensor)
• A camera, picture taking piece (Webcam)
• An “upload picture file to Azure Storage” piece (Azure)
• A simple LED status light (LED)
• And a separate Azure Website that displays the latest uploaded photos from Azure Storage (ASP.NET Website)
I’ve purposefully structured the code to clearly label and segment the above areas of code as much as possible, in case you’re interested in learning only a particular piece (e.g., “taking picture from webcam”, or “detect motion from Raspberry Pi”).
Note: The last Azure Website piece is somewhat optional. The Azure Portal offers a way to view all the uploaded photos online. But you’ll find that it’s extremely easy to create an Azure Website that gives a much better viewing experience.
In the real world, this solution would best operate as a headless application, but it’s presented here as a Universal Windows Application (C#) to help you monitor various statuses on-screen and make all logic easier to debug. You should be able to modify the application very easily to run in Windows 10 IoT’s headless mode (mind you, this application will still run as expected, as-is, without a screen output attached).
On startup, the application initializes the GPIO ports (used for PIR sensor reading and LED displaying) and the webcam. A function is tied to the PIR signal pin’s “ValueChanged” typed event handler to be called when motion is detected. It calls functions to take a picture using the USB webcam and then uploads the image to Microsoft Azure Blob Storage.
Raspberry Pi Configuration
This solution requires the Raspberry Pi to have an internet connection in order for it to upload the pictures to Azure. It can use a wired network connection, though that might not be logistically feasible in a real world installation. A USB Wi-Fi dongle will also work. This article describes the steps to connect a Raspberry Pi’s Wi-Fi to your network.
This solution also relies on a USB Webcam (any Windows 10 compatible webcam will do). Plug the camera in before launching the application and ensure the Raspberry Pi recognizes it. You’ll see it in the list of Connected Devices on the IoT boot up desktop screen when it’s recognized and ready to use (note: it may not show ‘webcam’ in its description).
PIR Motion Sensors
After testing with different sensor types, I found the PIR (Pyroelectric “Passive” Infrared) to be the perfect choice for this solution. They are inexpensive, tiny, low-powered and effective at detecting human movement at a reasonable distance (Adafruit’s site has a great article on How PIR Sensors Work). Other sensors that could be used in place of a PIR might include infrared break beams, ultrasonic distance measurers or magnetic door switches (to trigger on a door opening).
For more detail: Motion Sensor Surveillance Camera using Azure Storage (C#)


