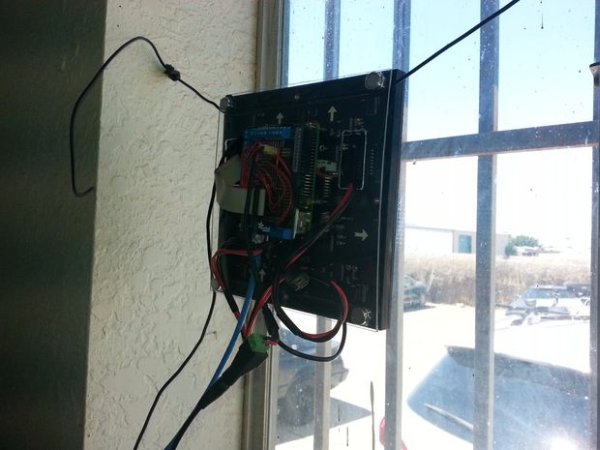
Neon is the name we gave to the open/closed sign we have at the entrance of our makerspace. This sign is not only an open/closed sign but it does a whole lot of things. At the makerspace we currently have access keys so this lets our members know whether we are open or closed by also updating our website and tweeting.
- Remote login is provided to H3 Labs administrators thru a website hosted on the Raspberry Pi 2 (RPI)
- A update message can be changed on the website
- The status of the shop can be set to either closed or open
- The Message will be reported on different mediums
- The message will be sent by the RPI along with the time at which the status was updated to Twitter (pictures)
- The message will be displayed on the led matrix in a horizontal scrolling fashion
- The Status will be reported on different mediums
- The Status is changed on our website by the RPI (pictures)
- The Status is changed on a file by the RPI which can be later be read by http://spaceapi.net/ to update our status.
- The Status is displayed on the led matrix by two different pictures which are scrolled across the screen
Now all of those features are pretty cool, but what is much nicer is that everything that concerns the workshop status is managed by the RPI alone. How the RPI is able to manage this is as follows:
- When the RPI is bootup up a pre installed daemon running our software hosted at https://github.com/h3labs/led-matrixd is started
- The daemon is written in C++/Ruby (most of the cpu intensive stuff is written in C++)
- The daemon starts an http sinatra server which runs the control website
- The daemon starts a Process mainly to run all the different displays shown on the led matrix
- The displays are updated automatically whenever the status or message changes
- Some displays show random pictures or games
- The daemon on the same Process as the led matrix code runs a thread which checks to see if a beacon file containing all the status/message information has changed (using inotify)
- If the status changes then it informs the respective parties (twitter, led matrix, website) about the changes.
How the code was written can be read in our code on our github page, but if you have any questions please let me know, i'll be happy to answer them.
Step 1: Wiring the Raspberry Pi 2 to the Led Matrix
Wiring the RPI to led matrix was done using some instructions that can be found on several websites:
- https://github.com/hzeller/rpi-rgb-led-matrix/ (connection subtitle)
- https://learn.adafruit.com/32×16-32×32-rgb-led-mat… (lots of steps, but it is simpler)
As for the internet connection we just cut an ethernet wire to the required size, and connected that to the RPI
Step 2: Setting up The Code
First login to your RPI using ssh. I assume you know how to do that, else just google it, there are plenty of ways to do it.
- run the following commands
- sudo apt-get install gcc make build-essential git
- mkdir work/
- cd work/
- gem install bundler -v 1.10.4
- git clone https://github.com/h3labs/led-matrixd.git #to get the code on your RPI
For more detail: Neon A Shop Open/Closed Makerspace Sign on Raspberry Pi 2 (El Paso, TX)


