
It is some time passed the last (modern) Millennium. We are now in the age of “Cloud Computing” yet there are still those who staff 24/7 Data Centers…… Where Inevitably “Legacy Systems” Lurk , running some forgotten but critical applications on hardware systems passed their prime.
These systems steadily hum along in the dark and dusty remote reaches of Data Centers HAUNTING operations staff; because no one truly knows the current status or utilization of such systems and even less is known about who set them up or how to support them in the event of a failure…. as no one gets many calls about them they are out of sight and out of mind….. UNTIL SOMETHING FAILS!!!!!!
.
WHAT HAPPENS IF THEY DO FAIL?
Such systems likely have no “Network Management” or Graphics cards…. in fact, this is in the case with Legacy UNIX systems the “Serial Console” is likely the only way to access or operate them in an emergency.
.
If you find that you need to get give yourself or someone else (out of band) remote access to a “Legacy System” that has no modern “Network Management” capabilities consider using a Raspberry Pi.
.
Not only is it a neat toy but it may, in fact, fill a need you did not know you had.
.
Something else you may enjoy:
http://www.instructables.com/id/Pi-Power-Remote-Power-Management-with-Pi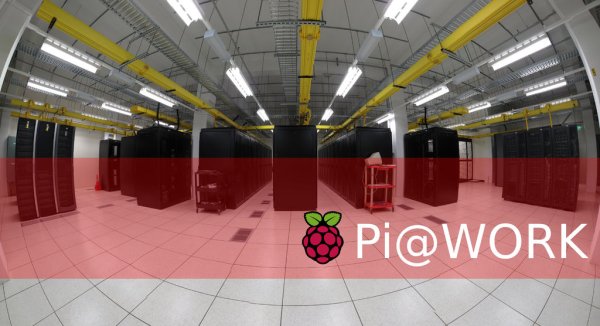
Step 1: PARTS
We will use a USB to TTL cable to both power and access the Pi as a headless Linux computer. The following steps will show how to setup “ARCH Linux” as a (Headless) “Pocket Serial Console Server” that can be used to access “Legacy Systems” anywhere in the Data Center.
.
Yes indeed, the Pi can be powered from just about any powered USB source…… so, you can use an (optional) battery pack or a powered USB port from any device or server to run a Pi.
.
ITEM LIST:
-Raspberry Pi
-Raspberry Pi Case
-USB to TTL Cable (Careful, some of these can have counterfeit chip sets and may not work correctly)
-USB to Serial Cable (Careful, some of these can have counterfeit chip sets and may not work correctly)
-SD Card (Careful, not all SD cards, “or revisions of prior working cards”, are Pi compatible.)
-Micro USB Wifi Adapter (Careful, not all adapters work with every Pi operating system; sometimes you need drivers)
-Null-Modem Serial Cable
http://www.amazon.com/s/ref=nb_sb_noss?url=search-alias%3Daps&field-keywords=raspberry+pi&rh=i%3Aaps%2Ck%3Araspberry+pi
http://www.amazon.com/Raspberry-Pi-Case-Enclosure-Black/dp/B00AZL16S4/ref=sr_1_3?s=pc&ie=UTF8&qid=1415975409&sr=1-3&keywords=raspberry+pi+case
Optional:
-External Smart Phone Battery Pack/Charger
Step 2: LOAD YOUR OPERATING SYSTEM
Put the SD card in your Linux system; sorry, no instructions for Windows systems at this time…..
[[ PREP SD CARD ]]
#You will need to be SUPER USER(root) to do this….
sudo -s
#ONE LINE FORMAT OF SD CARD (Careful, make sure this is the right device)
fdisk -l
fdisk -l /dev/mmcblk0
echo -e “p\no\np\nn\np\n1\n\n+100M\nt\nc\np\nn\np\n2\n\n\np\nw” | fdisk /dev/mmcblk0 #ONELINE
fdisk -l /dev/mmcblk0
## SETUP FILESYSTEMS
##
fdisk -l
fdisk -l /dev/mmcblk0
mkfs.vfat /dev/mmcblk0p1
mkdir -p /tmp/boot
mount /dev/mmcblk0p1 /tmp/boot
df -h
mkfs.ext4 /dev/mmcblk0p2
mkdir -p /tmp/root
mount /dev/mmcblk0p2 /tmp/root
df -h
[[ ARCHlinux: Raspberry Pi (Install OS) ]]
#You will need to be SUPER USER(root) to do this….
sudo -s
## GET ARCH LINUX OS FOR YOUR PI
##
mkdir -p ~/ARCHlinux
cd ~/ARCHlinux
wget http://archlinuxarm.org/os/ArchLinuxARM-rpi-latest.tar.gz
## COPY OS TO SD CARD
cd ~/ARCHlinux
gzip -dc ArchLinuxARM-rpi-latest.tar.gz | (cd /tmp/root; tar -xvf – )
df -h
(ls -al /tmp/root/boot; cp /tmp/root/boot/* /tmp/boot; rm -rf /tmp/root/boot/*; ls -al /tmp/root/boot) #ONELINE
ls -al /tmp/boot
df -h
umount /tmp/boot
umount /tmp/root
df -h
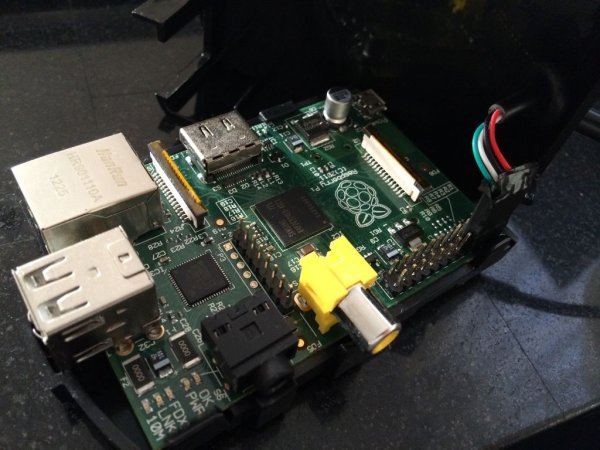
Step 3: THE CASE
This is the Pi case.
Step 4: LOAD THE CARD
Let's add the SD card with the OS.
Step 5: PLUGIN THE USB TO TTL
This is the proper pin out for connecting my “USB to TTL” cable to the Pi…… Beware, as the wrong connections here could destroy something.
NOTE: The “colors” and functions for your cable may vary from mine; so, please refer to the documentation for your “USB to TTL” cable…. or risk it…. it's what I did. …..but as results will vary; perhaps, it is best use a multimeter to check for such things as power. Of course, my multimeter battery was dead at the time so I just went for it. 😉
http://elinux.org/File:GPIOs.png
Step 6: MAKE SOME HOLES
I drilled a hole in the back of the case; because, I thought it looked nice and it was near the GPIO pins….. tied the inside and use electrical tape on the outside to make it look nice….. and it stops the wire from sliding in or being ripped out.
Step 7: CLOSE
Closed it up.
Step 8: HEADLESS
OMG, It's headless!!!
Once we close up our Pi, we can both power and access it via the USB end of the USB to TTL cable….. let's hope we wired it correctly!
.
#BOOT IT
Insert the SD card into the Raspberry Pi and use the serial console from the USB to TTL while plugged in to your LINUX system. The default root password is ‘root'.
.
[[ SERIAL CONSOLE (to Pi) ]]
use your favourite serial terminal command while your have your Pi plugged into you Linux System via USB.
http://www.computerhope.com/unix/ucu.htm
http://www.gnu.org/software/screen/manual/screen.html
[root@localhost ]# dmesg | grep -i tty
[ 0.000000] console [tty0] enabled
[ 19.385214] Bluetooth: RFCOMM TTY layer initialized
[37694.944976] usb 2-1.2: pl2303 converter now attached to ttyUSB0
[root@localhost ]#
.
#ATTACH TO (Pi) SERIAL CONSOLE FROM LINUX
dmesg | grep -i tty
sudo cu -l /dev/ttyUSB0 -s 115200
sudo screen /dev/ttyUSB0 115200
.
#NOTE: RECORD MAC ADDRESS (we are going to need this later)
ifconfig -a
poweroff
.
[root@alarmpi ~]# ifconfig -a | grep -i ether
eth0: flags=4099 mtu 1500 ether c8:27:cb:b0:76:89 txqueuelen 1000 (Ethernet)
wlan0: flags=4098 mtu 1500 ether 00:28:2f:38:9c:88 txqueuelen 1000 (Ethernet)
[root@alarmpi ~]#
.
#NOTE: Yes the Mac Address can also sometimes be found printed on the device…. such as on the USB Wifi Adapter….. it was just as easy to do it from here as we had to “test” boot it.
Step 9: Wait, can I get to the “Serial Console” of my Pi from Windows?
Yes you can, you only need to install something like “Putty” and add the correct drivers for the chip set in your “USB to TTL” cable……
#As I plug in the USB end of the “USB to TTL” cable into my Linux system and run a few commands it turns out my adapter is using a “Prolific Technology, Inc. PL2303 Chip”.
[oem@localhost ]$ dmesg | grep -i detec
[68930.101474] pl2303 2-1.2:1.0: pl2303 converter detected
[oem@localhost ]$
[oem@localhost ]$ lsusb
Bus 002 Device 004: ID 0a5c:5800 Broadcom Corp. BCM5880 Secure Applications Processor
Bus 002 Device 003: ID 8087:07da Intel Corp.
Bus 002 Device 014: ID 045e:0745 Microsoft Corp. Nano Transceiver v1.0 for Bluetooth
Bus 002 Device 015: ID 067b:2303 Prolific Technology, Inc. PL2303 Serial Port
Bus 002 Device 002: ID 8087:0024 Intel Corp. Integrated Rate Matching Hub
Bus 002 Device 001: ID 1d6b:0002 Linux Foundation 2.0 root hub
Bus 001 Device 004: ID 1bcf:2804 Sunplus Innovation Technology Inc.
Bus 001 Device 003: ID 413c:8187 Dell Computer Corp. DW375 Bluetooth Module
Bus 001 Device 002: ID 8087:0024 Intel Corp. Integrated Rate Matching Hub
Bus 001 Device 001: ID 1d6b:0002 Linux Foundation 2.0 root hub
[oem@localhost ]$
#DOWNLOAD AND INSTALL THE DRIVERS FOR THE WINDOWS SYSTEM
http://www.prolific.com.tw/us/showproduct.aspx?p_id=225&pcid=41
#DOWNLAND AND INSTALL PUTTY FOR THE WINDOWS SYSTEM
http://www.chiark.greenend.org.uk/~sgtatham/putty/download.html
#FIND THE COM PORT ON THE WINDOWS
You can click around in the “Device Manager”…..
mmc devmgmt.msc
…….or just use the command line querying the “Windows Registry”.
reg query HKLM\HARDWARE\DEVICEMAP\SERIALCOMM | find “REG”
.
#USE PUTTY TO OPEN A SERIAL CONNECTION TO THE PI
C:\>reg query HKLM\HARDWARE\DEVICEMAP\SERIALCOMM | find “REG”
\Device\ProlificSerial0 REG_SZ COM4
C:\>
putty -serial com4 -sercfg 115200,8,n,1,n
.
#NOTE: It is basically the same as with the “cu” command on Linux.
Step 10: GOT DRIVERS?
NO DRIVERS?
As it turns out the ARCH Linux install did not (by default) have the drivers needed for the Micro USB WIFI Adapter I have. (Edimax EW-7811Un) …but it turned out to be a popular Realtek chip set so I install the drivers by using the wired (Ethernet) connection on the Pi while attaching it to my wired network…… This time I used the optional USB battery pack…
#NOTE: It was online for over 3 hours as played around shortly after I got the wireless network setup and it seemed to only have used 3/4 of the battery; not bad. 😉
.
[root@alarmpi ~]# lsusb
Bus 001 Device 004: ID 7392:7811 Edimax Technology Co., Ltd EW-7811Un 802.11n Wireless Adapter [Realtek RTL8188CUS]
Bus 001 Device 003: ID 0424:ec00 Standard Microsystems Corp. SMSC9512/9514 Fast Ethernet Adapter
Bus 001 Device 002: ID 0424:9512 Standard Microsystems Corp. SMC9512/9514 USB Hub Bus 001 Device 001: ID 1d6b:0002 Linux Foundation 2.0 root hub
[root@alarmpi ~]#
For more detail: Raspberry Pi at Work: Serial Console Server