
Introduction
What happens when a Pi meets an Arduino?
A simple example would be, when building a mobile robot, we use the Raspberry Pi to extend its vision and get a nice tiny monitor. Meanwhile, Arduino handle nicely with the motor driving part and delivers fast responses like obstacle avoidance. Because, without the OS, the response time of rapid changes on the Arduino is much shorter. Also the high performance Pi can deals much easily with wireless communications, imaging and running complex algorithm.
Therefore, with the Arduino and Pi together, you get a powerful “brain” and “cerebellum” for your project, at one time.
Specification
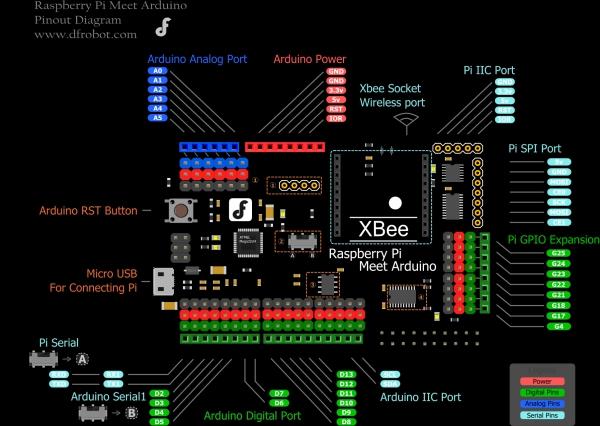
- Onboard Microcontroller: ATmega32u4
- Arduino Leonardo Chip
- Arduino Compatible pin mapping
- Compatible with All arduino standard shield and sensors
- System Voltage: 5v
- Extended 8 Raspberry Pi GPIO with Stardard 3pin sensor pin headers
- Extended Raspberry Pi SPI & I2C and UART port
- Dimension: 88mm x 56mm x 17mm
Features
- Integrate with the Xbee socket
- Available to be connected to Arduino or Raspberry Pi directly either
- Compatible with BLE Link(BT4.0)/Bluetooth Bee(BT2.1) and xbee modules
- Embeded DS1307 RTC module,which keeps time of the Pi even when the power is off, or the battery removed
- Bidirectional logic converter for Raspberry Pi GPIO to convert signal between 3.3v and 5v
- 3 pin headers sensor port for Arduino pins and Pi GPIO, directly compatible with hundreds of Arduino sensors and modules,like:
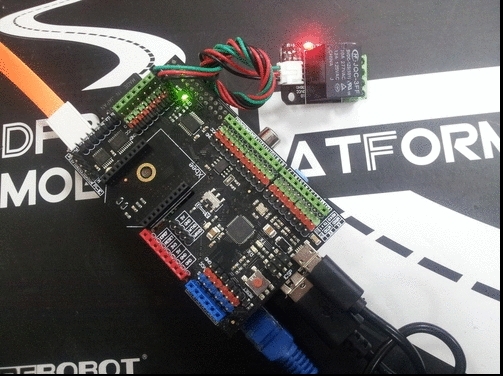
- Relay Module V3.1 for IOT AC control
- Analog pH Meter Kit for monitoring Water quality of your pool
- SHT1x Humidity and Temperature Sensor
- Motion Sensor for security and human detection
- And so on…
- Arduino shield compatible layout makes it possible to extend Arduino shield features for your Pi also,
Get Started with Pi Meet Arduino
First of all, let's control a sensor by Raspberry Pi directly with Meet Arduino Shield. Note: For this tutorial, we assume that you've known the basic knowledge about the Raspberry pi. And more details will be focused on how to extend and use more hardware modules and sensors for your Raspberry pi projects. In this part, we will control the Relay module with Python via Pi's GPIO.
Tools Required
- Raspberry Pi with Ethernet or WIFI connected
- Raspberry Pi Meet Arduino shield
- Relay module (or and LED module)
Software Required
- Python 2 Installed.
- Setup SSH on Raspberry Pi.
If you didn't install python. Please enter the following commands below into LX Terminal via SSH.
|
1
2
|
root@raspberrypi:/home/pi# sudo apt-get updateroot@raspberrypi:/home/pi# sudo apt-get install python-rpi.gpio |
Step by Step tutorial
1.Plug the Pi Meet Arduino shield to the Raspberry Pi, Which connected with the power and Ethernet.
2.Connect the Relay module(or LED module) to your Pi as the hardware connection shown.
3.Login in your Pi by Putty.
4.Create a Python example code using nano.
|
1
|
root@raspberrypi:/home/pi# nano blink.py |
|
1
2
3
4
5
6
7
8
9
10
11
|
import RPi.GPIO as GPIOimport timeGPIO.setmode(GPIO.BCM)GPIO.setup(4,GPIO.OUT)while True: GPIO.output(4,GPIO.HIGH) time.sleep(1) GPIO.output(4,GPIO.LOW) time.sleep(1) |
5.Run the python sample by the command below.And Check the effect. PS: The module is connected to the GPIO 4 matching the software configuration.
For more detail: Raspberry Pi Meet Arduino Shield SKU DFR0311.jpg