
If you have a backup of your digital media, it’s nice to have a convenient way to play it back. Running a dedicated media server is the usual way to do this, but a computer that’s up all the time can be pretty expensive in terms of electrical usage. Fortunately the Raspberry Pi 3 is powerful enough to run the popular media server software, Plex, and with an external hard drive, we’ve got plenty of space for our library.
Step 1: Install & Set Up Raspbian
This is going to be a pretty code heavy project, but if you’ve never built anything with Raspberry Pi, this is a great place to get started. The first thing we need to do is create a boot image for our Pi. An 8gb microSD card is plenty of space for this build. I really like the tool PiBakery to do this. It allows you to create an image that comes preconfigured for your wifi network, which is perfect for headless setups where you don’t have to bother with a keyboard or mouse.
To set up your image, grab the “on first boot” block, add the wifi setup block and type in your credentials, then from the settings tab, also add the block for “Add public SSH key” so we’ll be able to connect to our pi remotely. Write the full raspian image to our SD card. When it’s finished writing, pop it into the pi and power it up.
Once the pi boots and connects to your network, you’ll need to find its IP address. This is pretty easy using the mobile app called “Fing” It’s freely available on iOS and Android. If you don’t see the pi, reboot it – sometimes it requires a few boots to be able to fully connect.
Once you have the IP, you can connect to it using a protocol called SSH. There’s a client built into MacOS, and Windows users can use a piece of free software called PuTTY. When you”re prompted to login, use the default username and password of
username: pi
password: raspberry
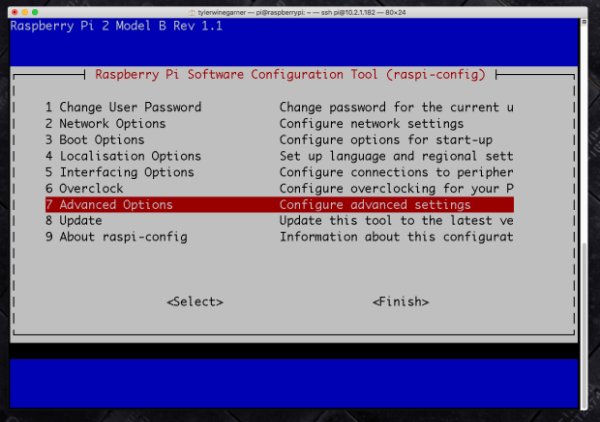
Once you’re connected and logged in, do a little bit of configuration using raspi-config. Give your pi a unique name, and change your default admin password – it’s a super easy step that will make your pi more difficult for others to break into. Then, change your boot behavior so that we just load the console and not the graphical interface.
Once we’re done with the config tool, we’ll update the pi to the latest version using these two commands.
sudo apt-get update sudo apt-get upgrade
The latter one will probably take a while, so if you haven’t had any coffee yet, now’s a great time to get some.
Step 2: Install the Software
With that out of the way we, need to make sure the HTTPS Transport package is installed – This command will take care of that for you.
sudo apt-get install apt-transport-https
Then we need to add the dev2day repository, which contains plex – and then configure it with a few commands – and then we need to update the pi again to reflect these changes.
wget -O – https://dev2day.de/pms/dev2day-pms.gpg.key | sudo apt-key add –
echo “deb https://dev2day.de/pms/ jessie main” | sudo tee /etc/apt/sources.list.d/pms.list
sudo apt-get update
Finally, we’re ready to install plex – it should only take a few minutes.
sudo apt-get install -t jessie plexmediaserver
Then you need to modify the config file so that plex runs as the default pi user.
sudo nano /etc/default/plexmediaserver.prev
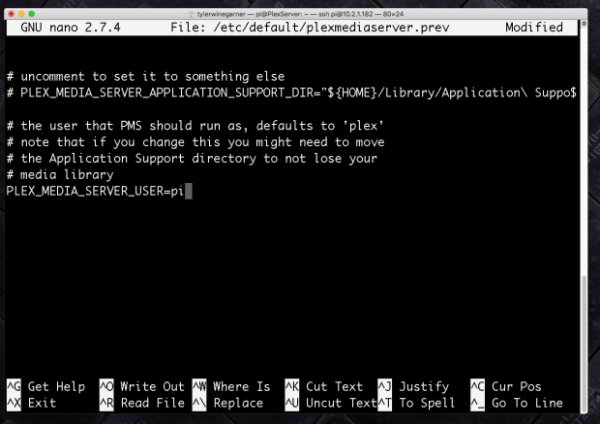
Look for the entry ‘PLEX MEDIA_SERVER_USER’ and change it from user ‘plex’ to the user ‘pi’. With that done, restart the plex server.
sudo reboot
Step 3: Set Up Your Media Library
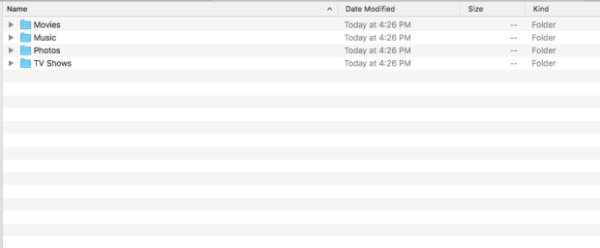
Ok, now we’ll start building up your library. You can start with any large hard drive connected to your primary computer, Since this is an easier place to start managing your files. Plex can manage libraries for movies, tv shows, music and photos – and it’s best to keep these libraries as separate root folders on your drive.
Plex has a few pieces of advice for filenames for TV series to help it organize them into folders for each season. With everything set up, disconnect your drive, put it into your enclosure and connect it to the pi via USB. If you intend to use a 2.5” drive that’s powered by USB, you’ll need to connect it through a powered hub, so it has enough power to run properly.
Linux doesn’t automatically load up any drive you connect to it, you need to do this manually. With your drive connected, type the following command
sudo ls /dev/sd*
It will list all of the drive devices you have connected to your pi, as well as each of their partitions. Chances are, the partition you want is found at /dev/sda1. Make a mount point for it by typing
sudo mkdir /media/library
and then mount it with the following command.
sudo mount /dev/sda1 /media/library
Have a look around, and see if your content is there. If it is, set it up to mount at boot by modifying your rc.local file.
sudo nano /etc/rc.local
You need to provide the full path for everything here, including the mount command – it should look like this.
/bin/mount /dev/sda1 /media/library
Once you’ve saved that file, reboot the pi and make sure that everything is mounted correctly.
Step 4: Set Up Your Plex Library
Last thing to do is set up plex. From a web browser, type in the ip address of your pi followed by :32400/web – you’ll need to create an account with the service if you don’t have one already, and then it will connect your plex server to the service.
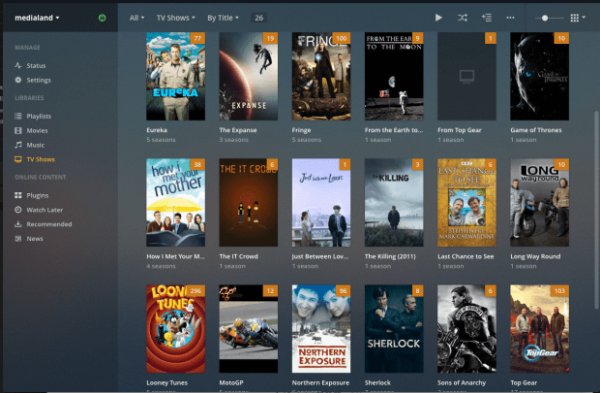
Next you’ll need to add some libraries – just add the library type you want to create, point it at the correct folder on your drive, confirm everything, and it will start populating the library with all the appropriate metedata around the title. This process can take a while, especially with extensive tv libraries, so make sure to give it a few hours.
When you want to add content to your library, you can always boot everything down and connect your drive to your computer as you did before, or you can upload directly to using secure FTP. Filezilla is a great application for this. When plex sees new files in the directory, it should automatically scan it for metadata and add it to your library. Any time you want to access your library in the future, just browse to http://plex.tv from any web browser. Most smart TVs and set top boxes should have a plex app available, and there’s a great mobile app as well. Happy streaming!
Read More Information…