
UPDATED, April 2020 This article describes the process of compiling ROS Melodic from source on new Raspberry Pi 4.
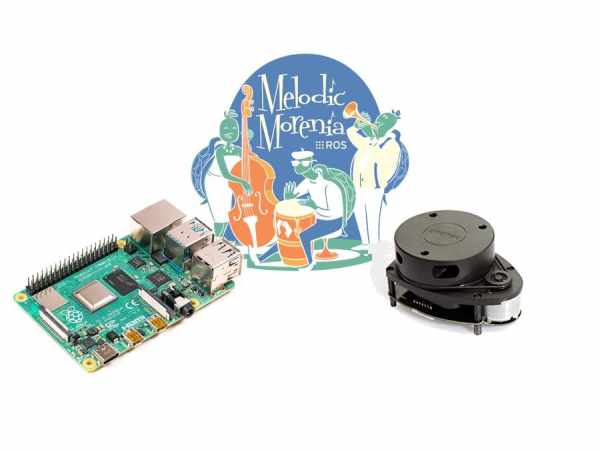
This article will cover the process of installing ROS Melodic Morenia on Raspberry Pi 4 running the latest Debian Buster and how to use RPLIDAR A1M8 with our installation.
Since Debian Buster was officially released just a few weeks ago(as of moment of writing this article), there are no pre-built ROS packages to install with apt-get, which is a preferred method of installation. Hence we will need to build it from source. Trust me, it's not that scary as it sounds. The process is described in this official tutorial, but to build ROS Melodic on Raspberry Pi we will need to make a few modifications.
In case you are still scared, here is a funny picture that *might* help you relax. Please do provide feedback if the level of relaxation provided was sufficient. If not, it will be replaced with picture of a funny cat.
The hardware for this article was kindly provided by Seeed studio. Check out Raspberry Pi 4, RPLIDAR A1M8 and other hardware for makers at Seeed studio store (use coupon code HACKSTER10 to save 10$ off Raspberry Pi 4 and RPILIDAR A1M8 bundle and get free shipping)!
January 2020 EDIT: Since it has been half a year since I posted this article there might have been some changes to ROS or Buster. I have made an image for Raspberry Pi 4 a while ago, after writing this tutorial. A contributor has uploaded it to Google Drive
https://drive.google.com/file/d/1lcPBYgdFG7EuaIV23…
April 2020 EDIT: I have found time recently to redo ROS Melodic installation on the newest Raspbian image from official Raspberry Pi site. I have edited this article accordingly. I also created and shared clean, compressed images:
Raspbian Buster Lite 2020-02-13 Release with ROS Melodic Bare-bones Need 8 GB SD card
Raspbian Buster with desktop 2020-02-13 Release with ROS Melodic Desktop Need 16 GB SD card
It might be the fastest way to get your system up and running. If you wish to compile ROS yourself, keep reading the article.
Step 1: Installing Bootstrap Dependencies and Download the Packages
Let's start by setting up the repositories and installing the necessary dependencies
sudo sh -c 'echo "deb http://packages.ros.org/ros/ubuntu $(lsb_release -sc) main" > /etc/apt/sources.list.d/ros-latest.list'
sudo apt-key adv --keyserver 'hkp://keyserver.ubuntu.com:80' --recv-key C1CF6E31E6BADE8868B172B4F42ED6FBAB17C654
sudo apt-get update
sudo apt-get install -y python-rosdep python-rosinstall-generator python-wstool python-rosinstall build-essential  cmake
Then initialize rosdep and update it
sudo rosdep init
rosdep update
When that's done let's create a dedicated catkin workspace for building ROS and move to that directory.
mkdir ~/ros_catkin_ws
cd ~/ros_catkin_ws
Now you have two choices:
ROS-Comm: (Bare Bones) installation – install this one if you are familiar with ROS and know what you are doing and what packages you will need. If you need packages not included in ROS-Comm, you will need to compile from source as well.
Desktop Install: includes GUI tools, such as rqt, rviz, and robot-generic libraries. Might be better choice for beginners to ROS.
I'll go with installing Desktop Install here.
rosinstall_generator desktop --rosdistro melodic --deps --wet-only --tar > melodic-desktop-wet.rosinstall
wstool init -j8 src melodic-desktop-wet.rosinstall
The command will take a few minutes to download all of the core ROS packages into the src folder.
If wstool init fails or is interrupted, you can resume the download by running:
wstool update -j4 -t srcStep 2: Fix the Issues
April 2020 EDIT: Skip this step, it seems all the issues have been fixed now.
Let's install the compatible version of Assimp (Open Asset Import Library) to fix collada_urdf dependency problem.
mkdir -p ~/ros_catkin_ws/external_src
cd ~/ros_catkin_ws/external_src
wget http://sourceforge.net/projects/assimp/files/assimp-3.1/assimp-3.1.1_no_test_models.zip/download -O assimp-3.1.1_no_test_models.zip
unzip assimp-3.1.1_no_test_models.zip
cd assimp-3.1.1
cmake .
make
sudo make install
Let's also install OGRE for rviz
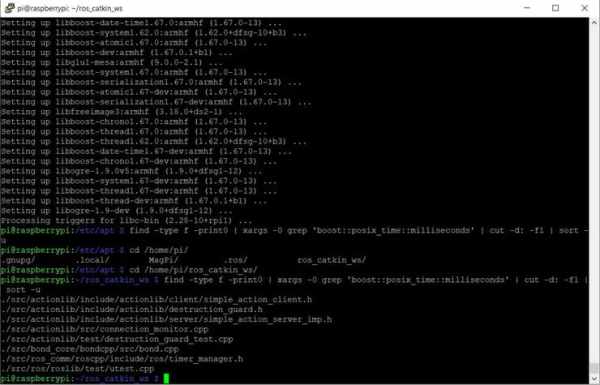
sudo apt-get install libogre-1.9-devFinally we'll need to fix the issues with libboost. I'm using the solution from this post on stackoverflow:
“The errors during compilation are caused by the ‘boost::posix_time::milliseconds' function which in newer boost versions accepts only an integer argument, but the actionlib package in ROS, gives it a float on several places. You can list all files using that function(!in ros_catkin_ws folder!):
find -type f -print0 | xargs -0 grep 'boost::posix_time::milliseconds' | cut -d: -f1 | sort -uOpen them in your text editor and search for the ‘boost::posix_time::milliseconds' function call.
and replace calls like this:
boost::posix_time::milliseconds(loop_duration.toSec() * 1000.0f));with:
boost::posix_time::milliseconds(int(loop_duration.toSec() * 1000.0f)));and these:
boost::posix_time::milliseconds(1000.0f)with:
boost::posix_time::milliseconds(1000)I recommend you use nano text editor, which is simpler than VIM 😉 Ctrl+O is saving, Ctrl+X is exiting and Ctrl+W is searching.
Next we use the rosdep tool for installing all the rest of the dependencies:
rosdep install --from-paths src --ignore-src --rosdistro melodic -y///continue_from_here///
Step 3: Build and Source the Installation
Once it has completed downloading the packages and resolving the dependencies you are ready to build the catkin packages (Run this command from ros_catkin_ws folder).
sudo ./src/catkin/bin/catkin_make_isolated --install -DCMAKE_BUILD_TYPE=Release --install-space /opt/ros/melodic -j2If the compilation process freezes(very likely, if you install the desktop version), you need to increase swap space available. By default it's 100 MB, try increasing it to 2048 MB.
Good luck! The whole compilation process takes about 1 hour, so go make some tea.
Now ROS Melodic should be installed on your Raspberry Pi 4. We'll source the new installation with following command:
echo "source /opt/ros/melodic/setup.bash" >> ~/.bashrcTry launching roscore to check if everything was successful.
Step 4: Install RPLIDAR ROS Package
Let's create a separate workspace for other packages, that are not part of core ROS.
From you home folder do:
mkdir -p ~/catkin_ws/src
cd ~/catkin_ws/
catkin_make
and source it to bashrc:
echo "source $HOME/catkin_ws/devel/setup.bash" >> ~/.bashrcOkay, we're ready to start installing RPLIDAR ROS package.
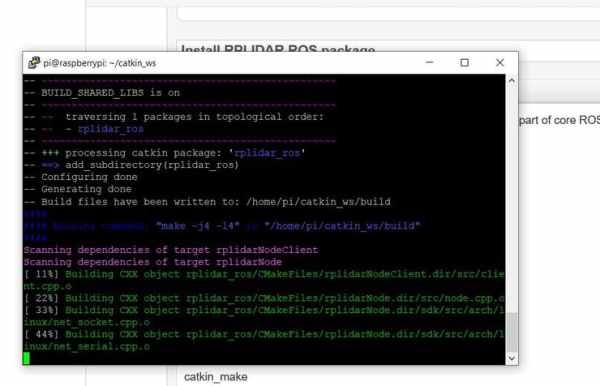
cd src
sudo git clone https://github.com/Slamtec/rplidar_ros.git
catkin_make
Wait for the package compilation to finish. Try launching the package to see if the compilation was successful:
roslaunch rplidar_ros rplidar.launchIf it doesn't output any errors, do a quick celebration dance(*optional).
Now only the last piece is missing – since you are probably running Raspberry Pi 4 in headless mode, we can't visualize lidar messages. For that we'll need to set-up ROS to run on multiple machines.
Step 5: Set Up ROS to Run on Multiple Machines
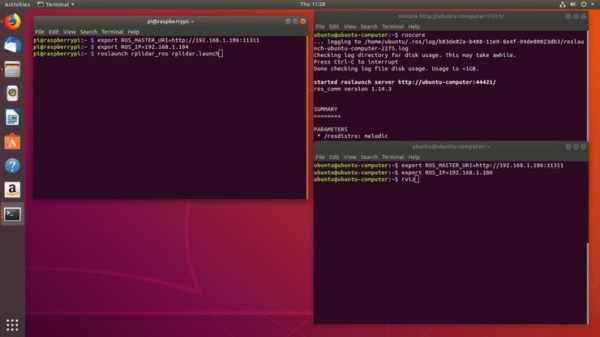
For this part you will need a Ubuntu 18.04 computer with ROS Melodic installed. Since it's Ubuntu ROS can be simply installed using apt-get as described in this tutorial.
After you have working ROS installation both on Raspberry Pi and your desktop machine, check the IP addresses of both machines. They need to be on the same network!
Run roscore on your desktop computer and export ROS_MASTER_URI
roscore
export ROS_MASTER_URI=http://[your-desktop-machine-ip]:11311
Next on Raspberry PI execute
export ROS_MASTER_URI=http://[your-desktop-machine-ip]:11311
export ROS_IP=[your-raspberry-pi-ip]
and launch RPILIDAR launch file
roslaunch rplidar_ros rplidar.launchIf it launches successfully, check the topics present on your desktop machine with rostopic list
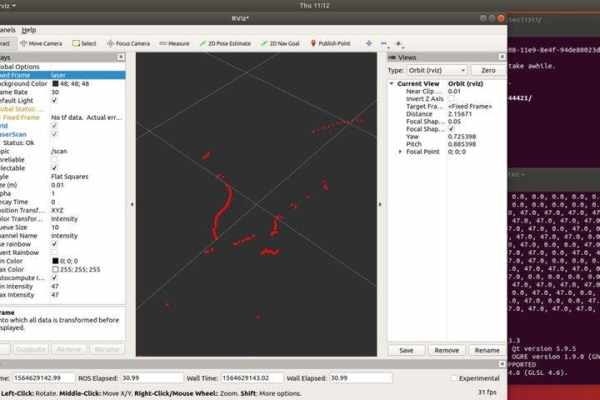
If you can see / scan messages, everything works as it supposed to work. Then launch RVIZ on your desktop machine, add Laser Scan messages and choose /scan topic. You will also need to change fixed frame to /laser.
Voila!
Step 6: Done!
This guide can be a first step towards building your ROS robot on top of new Raspberry Pi 4. We have installed ROS Melodic and prepared the installation for running headless and connecting to our desktop machine over wireless network for remote control.
Next steps are dependent on what type of robot you want to build. You can add motors and encoders for odometry, stereo camera for Visual SLAM and all sorts of other exciting and useful things.
Add me on LinkedIn if you have any question and subscribe to my YouTube channel to get notified about more interesting projects involving machine learning and robotics.
Code
sudo sh -c 'echo "deb http://packages.ros.org/ros/ubuntu $(lsb_release -sc) main" > /etc/apt/sources.list.d/ros-latest.list'

sudo apt-key adv --keyserver 'hkp://keyserver.ubuntu.com:80' --recv-key C1CF6E31E6BADE8868B172B4F42ED6FBAB17C654

sudo apt-get update

sudo apt-get install -y python-rosdep python-rosinstall-generator python-wstool python-rosinstall build-essential  cmake
Source: ROS Melodic on Raspberry Pi 4 [Debian Buster] + RPLIDAR A1M8