
LAMP is an acronym that stands for LinuxApacheMySQLPHP and are components required to run a Dynamic HTML webpage.
This instructable will demonstrate how you can turn your Raspberry Pi into a personal web server. The steps to install all of the components are relatively straight forward. After your personal web server is complete, you can use it to host a custom HTML or PHP resume, or a personal landing page which is what I chose to do.
Step 1: Materials
– SD memory card (4GB or larger)
– Power adapter compatible with the MicroB connector on the Raspberry pi
– Ethernet patch cable
– HDMI compatible monitor and HDMI cable
– USB Keyboard (no mouse is necessary, you can navigate the entire interface via keyboard. Arrow keys, Enter, ESC, etc.)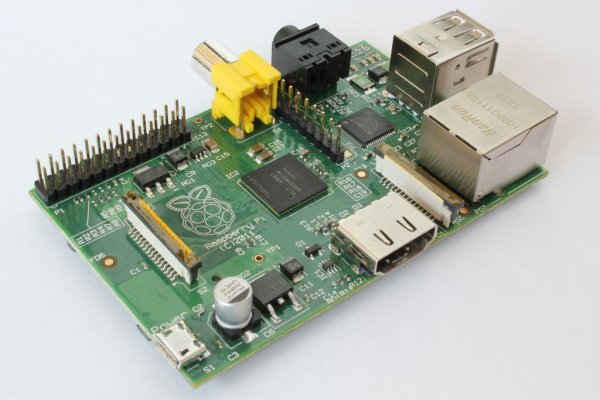
Step 2: Preparation
The Raspberry Pi always needs to boot off of an SD card loaded with an operating system (OS) disk image.
You may buy an SD card that has already been made bootable complete with the Raspberry Pi OS or you may buy a blank card and
There are many OS versions offered for the Raspberry Pi, however, in this example, I have chosen to use Raspbian “Wheezy”.
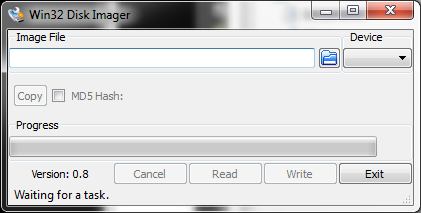
Download the OS disk image and write it to your memory card. To write the image I used Win32 Disk Imager. Once the image is written to the card, plug the card into the Raspberry Pi's SD card reader and power on the device. (Be sure you have all the proper I/O devices plugged in, i.e., keyboard, Ethernet cable, HDMI monitor.)
Step 3: Initial Configuration
Keep in mind, if you mess up anything along the way, just reformat your card, reload the disk image and start again. No harm no foul.
Upon powering the Raspberry Pi with the SD card plugged in, you will see the system automatically listing information about the operating system and peripherals. You do not need to know what it all means for this project, but I absolutely wouldn't discourage you from reading it and learning a little bit about your Raspberry Pi for your own benefit!
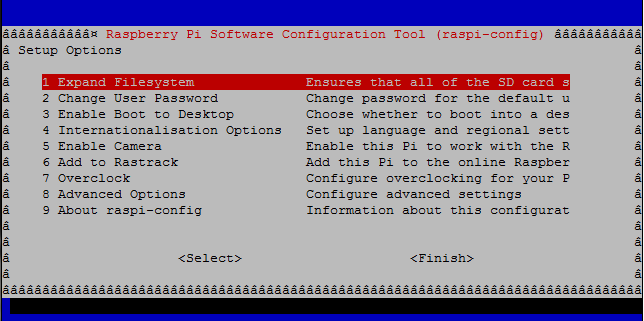
After the boot information is complete, you will be prompted with the raspi-config window. Here you should make the following changes:
– Expand root partition so all space on the SD card is usable.
– Set timezone.
– Enable SSH server (found in the Advanced Options)
– Disable boot to desktop, we want to configure this program using only the terminal environment.
– Update your Raspberry Pi (found in the Advanced Options)
– Reboot your Raspberry Pi at this time.
Use the following code to reboot your Raspberry Pi:
sudo reboot
* I also do not recommend overclocking your Pi for this project, the default setting works perfectly and overclocking will reduce the overall lifetime of the hardware. In addition, to get to this window any time after the initial configuration, use the following command: sudo raspi-config
Step 4: SSH set up
Now you will be able to ssh into your Pi so you can work on it from another computer if you would like. Once the Raspberry Pi reboots, it will prompt you for login information. Where it says “raspberrypi login: ” type the default username which is pi and hit enter. Where it says “password: ” type the default password which is raspberry
*when typing the password, no characters will be displayed. Don't get freaked out and think your keyboard stopped working. Just type out the password as you normally would and hit enter when you are done. I promise it is receiving your input!
At this point, find the IP address of your raspberry pi with the following command:
ifconfig
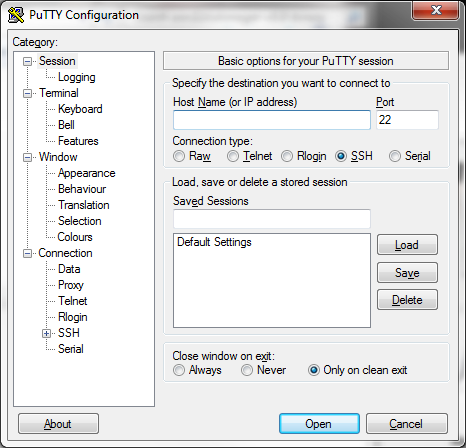
In the second line of the output you will see “inet addr: ” followed by a number to the effect of 192.168.1.1 (yours will be slightly different, but you get the idea). Write this number down and bring up your SSH client. For this example I am using an application called Putty as my SSH client. Type the IP address that you wrote down from the ifconfig step into the text field that says “Host Name (or IP address)”
It will prompt you for login information, this will be the same as before. Username is pi and the password is raspberry
Once logged in, it is a good security practice to change the default password. Change your password with the following command:
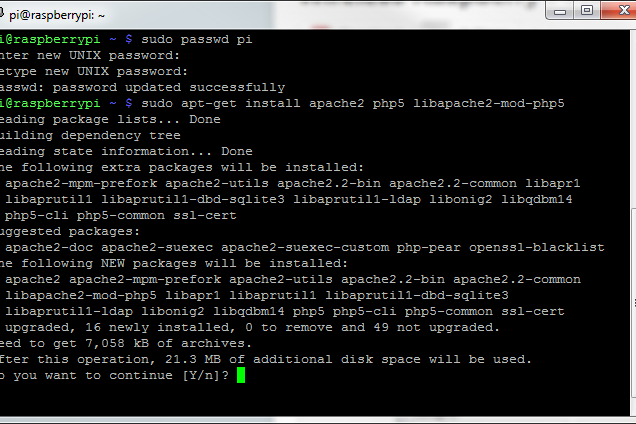
sudo passwd pi
Run the following commands to ensure your OS is up to date (hit enter after each and wait until one runs to completion before starting another):
sudo apt-get update
sudo apt-get upgrade
Step 5: Installing Apache
To install Apache and PHP, use the following command:
sudo apt-get install apache2 php5 libapache2-mod-php5
You will be prompted if you would like to continue, type y for yes and hit enter to continue. This process may take a few minutes.
If you get any errors, run the following commands:
sudo groupadd www-data
sudo usermod -g www-data www-data
Restart Apache with the following command:
sudo service apache2 restart
Now go to your web browser of choice and type the Raspberry Pi's IP address into the URL bar. (if you cannot remember the IP address, use the ifconfig command from earlier in this tutorial.
You should see a web page that says “It works!” like the picture above:
Step 6: Install MySQL
Install MySQL with the following command:
sudo apt-get install mysql-server mysql-client php5-mysql
You will be asked if you want to continue, type y for yes and hit enter to continue.
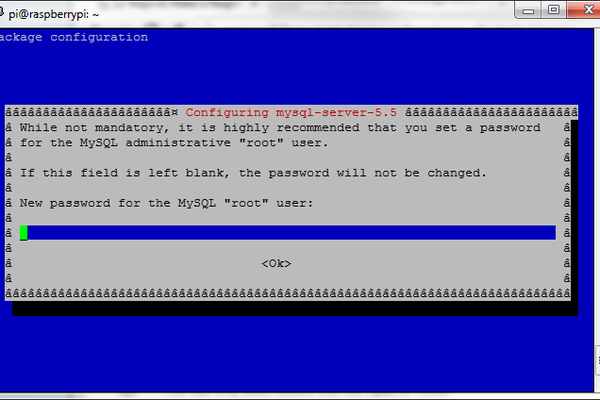
During the installation, you will be prompted to set a new password for the MySQL root user. Type a password of your choice, confirm the password again to continue the installation.
Step 7: Install FTP

Install FTP to allow transferring files to and from your Raspberry Pi.
First we have to take ownership of the web root. To do this, use the following command:
sudo chown -R pi /var/www
Next, install vsftpd with the following command:
sudo apt-get install vsftpd
Now we can begin the configuration process. First have to edit the vsftpd.config file.To edit the file use the following command:
sudo nano /etc/vsftpd.conf
Find and edit the following lines as specified:
Change anonymous_enable=YES to anonymous_enable=NO,
Uncomment local_enable=YES
Uncomment write_enable=YES
then go to the bottom of the file and add force_dot_files=YES
*to uncomment, remove the pound sign (#) in front of the specified line
exit the editing interface by pressing ctrl+X, type y to confirm the changes and press enter to save the file path.
Restart the FTP service with the following command:
sudo service vsftpd restart
Step 8: Finalization

Change the root password of your Raspberry Pi with the following command:
sudo passwd root
Add the user root as a mod with the following command:
sudo usermod -L root
At this point, your server should be up and running and you should be able to transfer files through FTP by using your servers IP address and connecting using port 21.
I will go into detail about how I added an HTML resume to my Pi when I have another spare moment, but for now you all can at least have all the proper components installed on your machines to start exploring the possibilities on your own!
Source: Turning your Raspberry Pi into a personal web server