
Basic IoT – RaspberryPI and HDC2010 I2C breakout by itbrainpower. net – RPI HDC2010 temperature and humidity sensor how to

About this tutorial
This tutorial address Raspberry PI 4, 3B+, 3B, 3A+, II, B, Zero and Zero W hardware and software integration with s-Sense itbrainpower.net HDC2010 high precision temperature and humidity I2C sensor.
Bellow HDC2010 software was tested on Linux Debian using Python 2.7 with python-smbus2 module loaded.
About HDC2010 – temperature and humidity sensor
Texas Instruments HDC2010 is a high accuracy digital temperature and humidity sensor. Main measurement characteristics:
- relative humidity range 0% – 100%
- humidity accuracy +-2% (factory calibrated)
- temperature from -40C to +125C (functional) and -40C to +80C (operational)
- typical temperature accuracy +-0.2C (factory calibrated)
- embedded heating element to burn away condensation
More info on: HDC2010 datasheet.
In June 2019 we've released 6 new environmental and air quality sensors, including HDC2010 I2C sensor breakout and HDC2010 + CCS811 I2C combo sensors breakout, all being part of the s-Sense I2C sensor breakout family.
s-Sense HDC2010 sensor breakout by itbrainpower.net
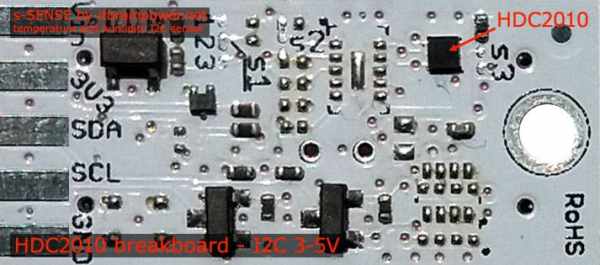
PN: SS-HDC2010#I2C SKU: ITBP-6005 HDC2010 I2C sensor breakout info
s-Sense HDC2010+CCS811 sensor breakout by itbrainpower.net
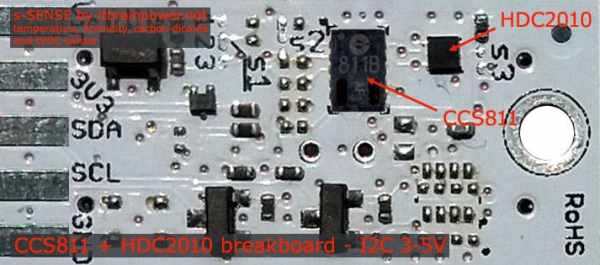
PN: SS-HDC2010+CCS811#I2C SKU: ITBP-6006 HDC2010+CCS811 I2C combo sensor breakout info
Next, let's kickstart with HDC2010 sensor I2C breakout – around 15-20 minutes. Same hardware and software approach may be used for CCS811 + HDC2010 bundle sensors I2C breakout.
RaspberryPI [Debian based Linux] setup, preamble software and hardware preparation
A. Enable I2C channel 1 on Raspberry PI
a. sudo raspi-config
menu F5 => select enable I2C option
save, exit.
sudo reboot now
b. edit /boot/config.txt and add/enable following directives:
dtparam=i2c_arm=on
dtparam=i2c_arm_baudrate=10000
save, then reboot RPI
B. Check i2c is loaded using command: ls /dev/*i2c*. This should list something like: /dev/i2c-1
C. Check sensor I2C communication [HDC2010 should be connected, see wiring in next chapter].
Run: i2cdetect -y 1.
In command output you should see listed the s-Sense HDC2010 I2C default address 0x40.
D. Install required python packages
a. sudo apt-get install python-setuptools
c. Expand downloaded tar.gz archive. tar -xf smbus2-0.3.0.tar.gz command will do the job.
d. chdir smbus2-0.3.0
e. sudo python setup.py install
* python-smbus2 package is also available here: https://itbrainpower.net/downloadables/smbus2-0.3.0.tar.gz
RaspberryPI HDC2010 sensor hardware integration (basic wiring)
s-Sense by itbrainpower.net HDC2010 sensor is compatible with all Raspberry PI versions! Next, all wiring directives are exemplified for Raspberry PI 4, 3B+, 3B, 3A+, II, B, Zero and Zero W.
GPIO naming convention used in wiring description and in software is “GPIO pin number” – GPIO.setmode(GPIO.BOARD). In a nut shell, wire as bellow:

Bellow, basic HDC2020 sensor wiring to RaspberryPI with safe sensor powering from RaspberryPI 3.3V pin:
Python HDC2010 sensor software
a. download HDC2010 RaspberryPI Python library from: here.
b. expand tar.gz archive. Go inside new created folder.
c. Save the file HDC2010 – RaspberryPI read sensor data Python code as “hdc2010_simple.py” in the python library folder.
d.Check HDC2010 params in “hdc2010_param.py” file. Run HDC2010 code with command “python hdc2010_simple.py“.