
Beer brewing is a fun hobby, whether you wanna just brew something easy from a kit, or take the time to fine-tune your preferred style. With every batch, there are always two things that weigh heavy on a brewer’s mind: risk of contamination or, depending on where you live, extreme temperatures. I live in an area where the temperature often dips below 60° F during the winter, which is too cold for the yeast to thrive. Using a space heater wastes a ton of energy, and I’ll still have to turn it off manually. I decided to tackle this problem.
 At the very least, I knew I would need a heating belt, a temperature sensor, and an AC power source that can be activated/deactivated. Generally speaking, heating belts don’t come with any sort of feedback control, and an off-the-shelf regulator costs far more than I’m willing to pay. After a bit of research, I decided that I needed the following:
- 1 x Arduino micro-controller
- 1 x DS18B20 waterproof temperature sensor
- 1 x character LCD
- 1 x 10 kΩ trimmer, to adjust the LCD contrast
- 2 x 330 Ω, 1/4 W resistor
- 1 x 100 Ω, 1W resistor
- 1 x IR sensor
- 1 x 2N6344G TRIAC
- 1 x MOC3023 optoisolator
- 1 x 2N2222 NPN
- 1 x DIP IC socket
- 1 x 250 VAC, 0.5 A, 1.25″ x 0.25″ fuse
- 1 x fuse holder for 1.25″ x 0.25″ fuse
- 1 x Brew Belt
- some wires
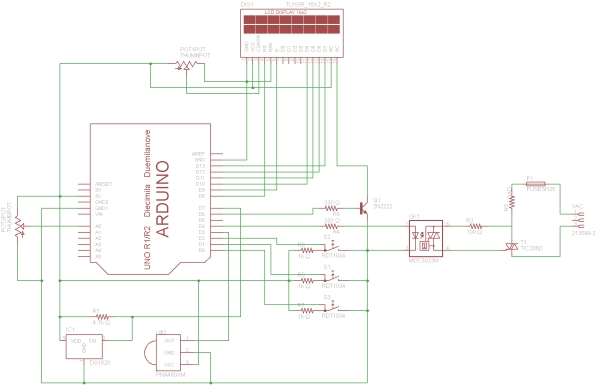
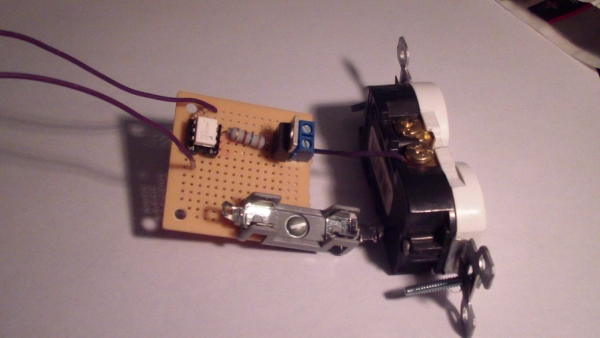
I started off the project by doing a bit of programming on the Arduino to display the temperature read by the sensor on the LCD, and the IR sensor to trigger the LCD backlight (via the Arduino). Once that all worked, I was left with a dilemma: I could use either an electromechanical relay or a solid state relay, like a TRIAC. Since I had no experience in using one, I went with the TRIAC.
For more detail: DIY Temperature Monitoring and Regulation for HomeBrew