
Significance of UART in embedded Linux development
Linux porting is a difficult task. We can’t simply boot a Linux board by building u-boot, kernel, and root file system images. This type of approach never works. It will end up with several issues like kernel panics, device driver issues, device tree issues, bootloader issues, etc…
So to debug entire system, we need an interface that can send debug information from Linux hardware (raspberry pi) to a computer. There are three possible ways
-
Network
-
Video
-
UART
Network and Video interfaces are not so popular in terms of system debugging. They need special hardware and initializations. Much custom Linux hardware doesn’t come with and video and network interface. In fact, network and video interface are not available during first a bootloader stage.
But UART is considered to be a basic peripheral for all SOCs. UART does not require any special hardware. Transmitter (Tx) and receiver (Rx) lines are enough to debug entire system.
Raspberry PI UART pins
***** Download Raspberry Pi B+ schematics here *****
For any board, first of all you need to find the ‘tx’ and ‘rx’ lines of the UART. For this, you need board schematics. Download raspberry pi schematics from the above link.
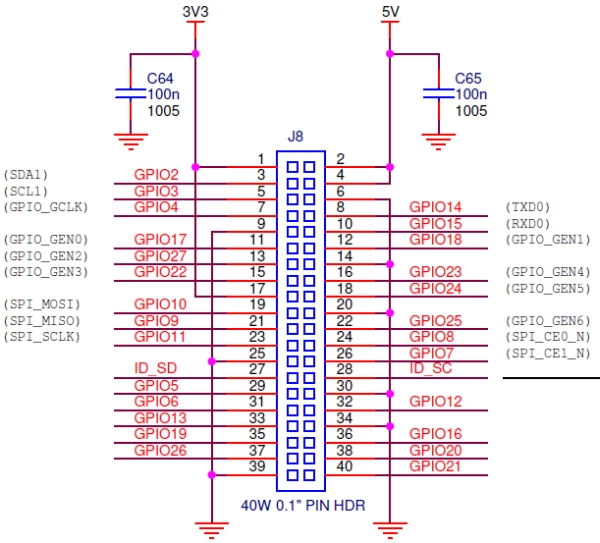
For raspberry, UART ‘tx’ and ‘rx’ pins are available on GPIO header (J8 connector). Refer “GPIO EXPANSION“ section in the schematics.
On GPIO header, pin-8 and pin-10 are UART ‘tx’ and ‘rx’ pins.
-
-
PIN8 – TXD
-
PIN9 – RXD
-
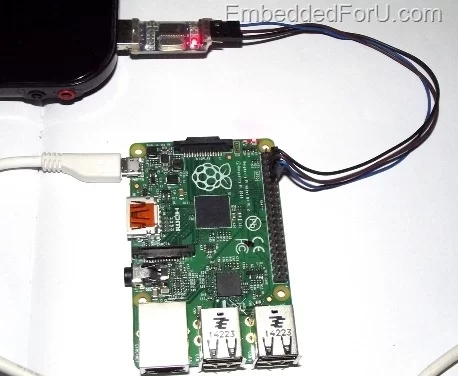
 Raspberry Pi board ‘tx’, ‘rx’ pin identification has shown below. You can use PIN6 as common ground between raspberry Pi and a computer.
RPi UART to a computer
Two ways you can connect the UART to a computer
-
Via a USB to UART converter
-
Via a standard RS232 port
For more detail: How to connect Raspberry Pi UART to a computer