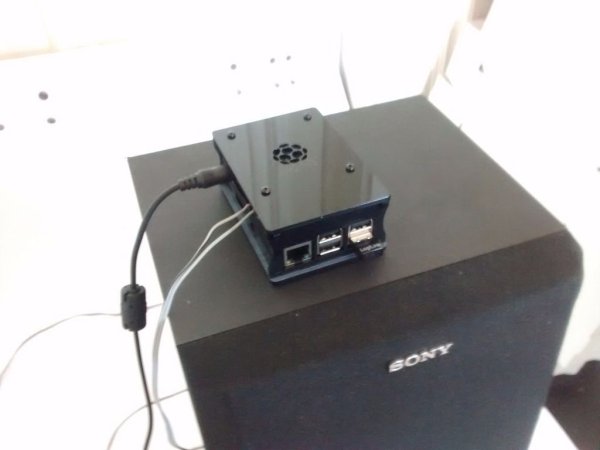
Our main ideas of a perfect mobile media center are:
– watch videos or listen to your music anywhere (only power supply and a monitor/projector for videos required)
– easy control with your smartphone
– simple setup for non-programmers
– great sound and video quality
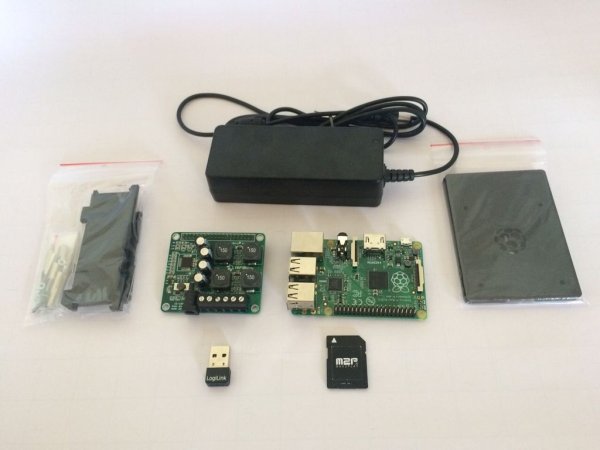
With a Raspberry Pi 2 and a powerful sound card like the HiFiBerry Amp+; together with an SD-Card with Max2Play and a simple WiFi Stick, you already have everything you need together!
This small tutorial shows how to easily set up Max2Play to get everything working. You do not need any knowledge of Linux or programming and just 5 minutes of time to set this up! There are various images, all free downloads.
Step 1: The Components and Their Purpose
The essential parts required are:
– Raspberry Pi 2B
The heart of this media center is the affordable but powerful 2B, it can handle multiple audio and video players with its quad core processor and 1 GB RAM.
– USB WiFi Stick
A simple USB-connected WiFi Stick to use as an access point that lets us control the Pi from any device in its vicinity.
– MicroSD Card with Max2Play Image
The Linux-based Max2Play image includes the Kodi media center and various audio players and other extensions that can be managed from any web browser. Once burnt, the system works right away and does not require any further configuration.
– (Optional) A Sound Card for Better Audio Performance
The Max2Play image is perfect to optimize and configure sound cards like HiFiBerry's DAC+ and Amp+ with just a few clicks. These sound cards can make a huge difference in sound quality for a media center.
Step 2: Burn the Image on the microSD Card
The images for download on Max2Play are all packed in .rar or .zip files and can be burnt onto a card using a simple tool like the WinDiskImager for Windows. Just let it burn and once the process is done, put the card into the Raspberry Pi.
Optional: You can also order an already burnt and configured microSD card from Max2Play.
Step 3: Set Up the Access Point
To be able to access our Raspberry Pi from anywhere on the go with our smartphones and tablets, we have to set up an access point with our connected WiFi stick.
The Access Point Setup extension is a premium feature on Max2Play, so we need to have an activated account. Once this is the case, we can activate the extension. It is just a web page with a button saying “install”. When we click it, the system automatically detects the WiFi Stick and sets it up as an access point for any outside devices.
For more detail: Raspberry Pi Mobile Media Center with Smartphone Control


